

The Footwear Developer's Sample Review Toolkit
Reviewing a footwear sample is much more than asking whether the shoe “looks right.” A professional footwear developer needs to verify the sample against the approved design, last, materials, measurements, color standards, construction requirements, fit expectations, and previous development comments.
A good sample review kit makes those decisions objective. Instead of telling a factory that a midsole feels “too soft” or a collar “looks too high,” the developer can measure the problem, document it, and communicate a precise correction.
Based on the footwear-development and sample-evaluation practices covered by Shoemakers Academy, here are the tools and references every footwear developer should have available when reviewing samples.
The Footwear Developer’s Sample Review Toolkit
- Zero-start steel ruler — For collar heights, tongue heights, sole dimensions, seam locations, foxing heights, and other straight-line measurements.
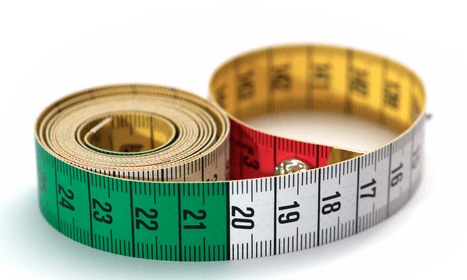
- Flexible measuring tape — For girths, circumferences, curved surfaces, and foot or ankle measurements.
- Digital or dial calipers — For precise widths, hardware dimensions, molded details, and small components.
- Micrometer or thickness gauge — For checking leather, textile, synthetic, foam, and other material thicknesses.
- Gram scale — For checking total shoe weight and individual component weights.
- Shore A durometer — For measuring the hardness of rubber, TPU, and similar dense materials.
- Asker C durometer — For measuring the hardness of EVA, PU, midsoles, footbeds, and other softer foams.
- Brannock device — For confirming the fit tester’s actual foot length and width before evaluating fit.
- Adjustable dividers — For transferring and comparing dimensions that are difficult to measure with a ruler.
- Pantone color book or approved color standard — For verifying upper, sole, logo, trim, and component colors.
- X-Acto or sharp hobby knife — For opening seams, cutting swatches, and carrying out controlled sample tear-downs.
- Multi-tool or pliers — For removing hardware and separating components during construction review.
- Lasting pliers — For examining lasted construction and hidden areas around the lasting margin.
- Profile or contour gauge — For comparing complex curves on lasts, midsoles, and other components.
- Approved sample last — For checking toe shape, vamp relationship, last conformity, and overall shoe geometry.
- Current tech pack and specification — The primary reference for measurements, materials, colors, components, construction, and revisions.
- Design drawings, patterns, material standards, and approved reference sample — For checking design intent and consistency between development rounds.
- Phone or camera — For documenting defects, measurements, corrections, and comparison views.
- Fine-tip marker, pencil, and masking tape — For marking the exact location of requested corrections on the sample.
- Sample review checklist or comment sheet — For making sure every sample is reviewed systematically and nothing is missed.
A Sample Review Should Produce Measurable Comments
The purpose of these tools is not simply to inspect the shoe. The goal is to create clear, actionable development instructions.
Instead of:
“The midsole feels too hard.”
A better comment is:
“Midsole measures 61 Asker C. Approved target is 55 +/- 3 Asker C. Please correct compound hardness for the next sample.”
Instead of:
“The collar looks high.”
A better comment is:
“Lateral collar height measures 72 mm. Reduce to 68 mm according to the specification.”
Those comments are easier for the factory to understand, easier to verify on the next sample, and much less likely to be interpreted differently by different people.
Build a Kit That Travels With the Developer
A footwear developer does not necessarily need a complete laboratory at every sample review. The most useful setup is a portable kit containing the measurement and documentation tools used every day, supported by additional testing equipment in the development office or factory.
At minimum, the developer should arrive with the current specification, approved standards, appropriate measuring tools, sample history, and a structured review checklist.
When development decisions are based on measurements and agreed standards rather than impressions, sample rounds become more efficient, communication improves, and the product has a much better chance of reaching production exactly as intended.
A steel ruler is one of the simplest and most frequently used tools on a developer’s desk. The key feature is a true zero-start edge: the measurement begins at the physical end of the ruler rather than slightly inward.
That allows the developer to place the ruler directly against the inside or outside of a shoe and accurately check dimensions such as collar height, tongue height, eyestay location, foxing height, midsole thickness, outsole dimensions, and seam positions.
A ruler is especially valuable when comparing a new sample against the specification or an approved reference shoe. Small dimensional differences can create surprisingly large visual and fitting changes.
Not every part of a shoe can be measured in a straight line. A flexible measuring tape is essential for dimensions that follow the contour of the shoe, last, or foot.
Developers can use it to check girth measurements, collar openings, ankle dimensions, forefoot circumference, and other curved areas.
It is also useful during fitting because a developer can compare the dimensions of the tester’s foot with the last and finished shoe rather than relying only on the stated shoe size.
o.
Calipers provide a level of precision that a ruler cannot. They are useful for checking small molded components, outsole lugs, hardware, eyelets, straps, webbing, component widths, and dimensional relationships between parts.
Digital calipers are particularly convenient because the measurement can be read immediately and recorded in a development report.
When tooling or molded parts are being corrected, a difference of only a few millimeters may be important. Calipers make those corrections measurable rather than subjective.
Materials that appear identical can perform very differently if their thickness changes.
A micrometer allows the developer to verify whether leather, mesh, synthetic material, foam, lining, reinforcement, or other components match the specification.
This is important because thickness can influence flexibility, durability, fit, appearance, weight, and cost. A substitution that looks acceptable at first glance may change the performance of the finished shoe significantly.
Weight matters in almost every category of footwear, but it is particularly important in running, training, hiking, court, and other performance products.
A small digital gram scale allows the developer to track the finished shoe weight from one development round to the next.
When a shoe becomes unexpectedly heavy, individual components can also be weighed to identify the source. The issue may come from the outsole, midsole, reinforcement package, upper material, hardware, or even excess adhesive.
A material can look correct and still have the wrong hardness.
A Shore A durometer is commonly used for denser materials such as rubber and some TPU components. It gives the developer an objective hardness reading that can be compared with the approved specification.
This is much more useful than comments such as “the rubber feels too hard.” A numerical measurement gives the factory and material supplier a specific target for correction.
Softer foam compounds usually require a different hardness scale. An Asker C durometer is commonly used for materials such as EVA and other footwear foams.
Developers can use it when reviewing midsoles, footbeds, inserts, cushioning components, and related materials.
Foam hardness can directly affect comfort, ride, flexibility, compression, and perceived quality. Monitoring hardness also helps identify differences between development samples and later production.
A fit review is only useful when the developer knows the actual dimensions of the person wearing the shoe.
A Brannock device helps establish the tester’s foot length and width before the sample is evaluated.
Without that information, statements such as “the shoe fits short” or “the forefoot is too narrow” can be misleading. The problem may be the sample, the last, the selected size, or simply the tester’s foot shape.
Good fit evaluation begins with good foot data.
Dividers are extremely useful for comparing dimensions that are difficult to capture with conventional measuring tools.
The developer can set the divider to a feature on the approved shoe, last, or one side of a sample and then transfer that dimension to another location.
This makes dividers useful for checking symmetry, comparing left and right shoes, reviewing last relationships, and comparing development rounds without relying solely on numerical measurements.
Computer screens, phone photographs, factory lighting, and office lighting can all make the same color appear different.
For that reason, footwear developers need a physical approved color reference.
Pantone standards are useful for communicating targets, but an approved material swatch is often even more important because material texture and finish affect color appearance.
Colors should be reviewed under consistent lighting whenever possible.
Sometimes the only way to understand a construction problem is to open the shoe.
A sharp hobby knife lets the developer cut seams, remove sections, inspect backing materials, examine foam packages, and expose hidden construction.
Destructive sample review can reveal problems that are invisible from the exterior, including incorrect reinforcement, excessive adhesive, missing components, poor skiving, or incorrect material layering.
Appropriate care and cutting procedures should always be used.
A multi-tool becomes invaluable during tear-down work.
It can be used to grip and remove components, pull out hardware, separate bonded parts, cut threads, and investigate how the sample was assembled.
This is particularly useful when a visual defect appears to originate from something happening beneath the surface of the shoe.
Lasting problems can create wrinkles, poor toe shape, uneven toplines, distorted pattern lines, and incorrect fit.
Lasting pliers allow the developer to pull and examine material around the lasting margin and inspect areas that normally remain hidden beneath the sole construction.
They are especially useful when reviewing early development samples or investigating whether an issue originates with the pattern, last, material, or lasting process.
Footwear contains complex three-dimensional curves that can be difficult to describe numerically.
A contour gauge captures the shape of a curved surface so that the profile can be compared with another last, midsole, outsole, or sample.
It is particularly helpful when the problem is not simply that something is “too high” or “too wide,” but that the actual curvature or transition is incorrect.
The last is one of the most important references in the entire development process.
Having the correct approved last available during review helps the developer determine whether the upper is conforming correctly and whether the finished shoe maintains the intended toe shape, forefoot shape, vamp relationship, heel geometry, and overall proportions.
When reviewing early pullovers or development samples, the last can help distinguish a pattern problem from a lasting problem.
The tech pack is effectively the rulebook for the sample.
It should identify the approved materials, components, measurements, colors, construction details, artwork, logos, tooling requirements, and other product specifications.
The developer should always make sure the document being used during review is the current revision. Reviewing against an outdated specification can generate unnecessary corrections and confusion between the brand and factory.
A sample should be judged against an agreed standard, not memory.
Not every design requirement can be captured in a measurement table.
The original design drawings help confirm proportions and visual intent. Pattern files help identify whether seam and panel relationships are correct. Material standards allow the developer to compare texture, thickness, finish, stretch, and appearance.
An approved reference shoe can be particularly powerful because it provides a physical benchmark for shape, workmanship, proportions, and construction.
Together, these references help preserve the original product intent as the design moves through multiple rounds of development.
Development comments are much more effective when they are visual.
Photographs can document defects, measurements, pattern changes, tooling issues, color differences, asymmetry, and requested corrections.
Useful sample-review photography should be deliberate. Capture consistent side, medial, top, heel, outsole, and detail views when appropriate.
Adding a ruler, arrow, tape marker, or other reference directly in the photograph can make factory instructions even clearer.
Sometimes the fastest way to explain a correction is to mark it directly on the shoe.
A developer can identify where a seam needs to move, where a collar should be lowered, where an overlay should end, or where a tooling feature needs adjustment.
Masking tape is particularly useful because it can create temporary reference lines without permanently marking certain sample materials.
The marked sample and corresponding photographs can then be used together with written factory comments.
The most important tool may be the one that makes sure all the others are actually used.
A standardized review checklist prevents developers from focusing only on the most obvious problem and overlooking another important category.
A comprehensive sample review should consider areas such as design intent, measurements, fit, pattern execution, materials, color, hardness, weight, construction, tooling, symmetry, workmanship, branding, and the corrections requested during the previous round.
A consistent checklist also creates a development history. That makes it easier to determine whether requested changes were completed and whether new problems appeared during the next round.