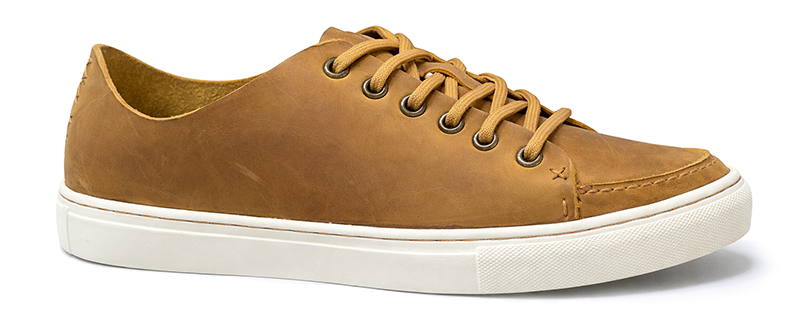
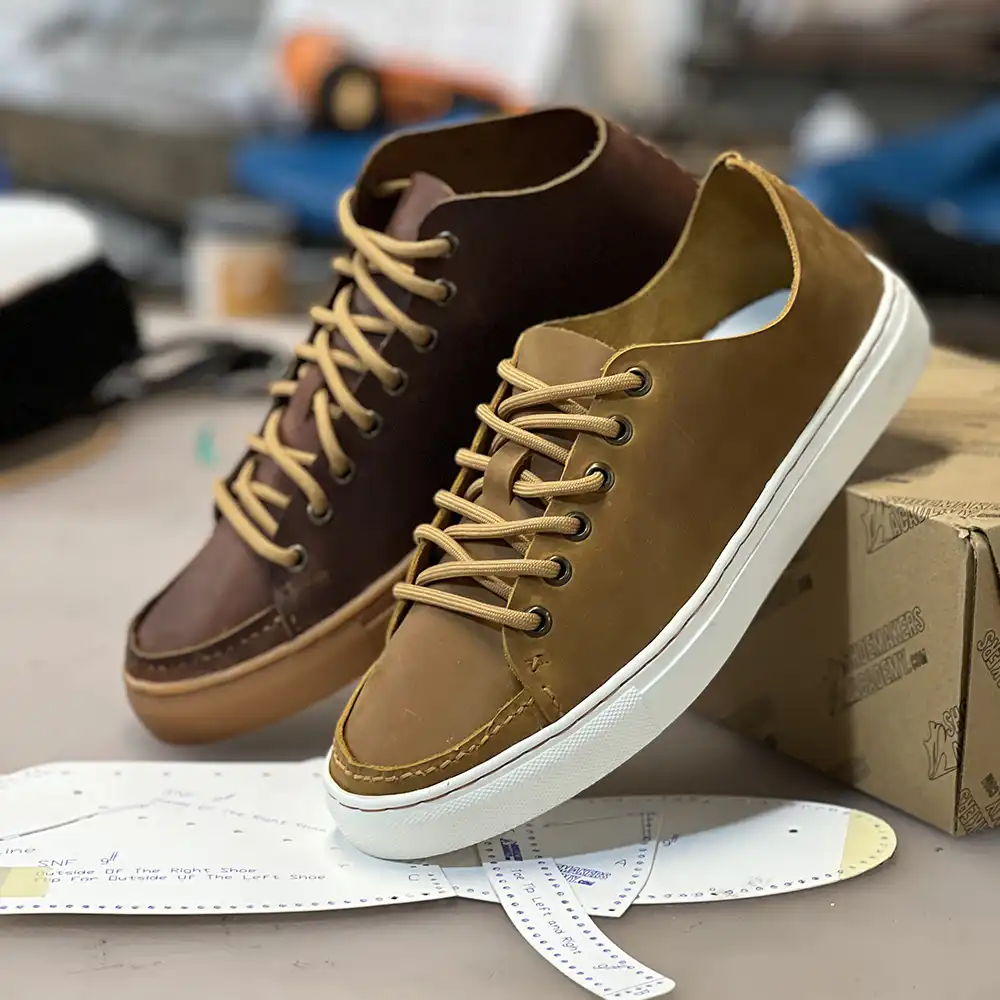
DIY Shoemaking Kit Full Build Video
DIY Shoe Assembly: A Beginner-Friendly Guide
How to Build a Pair of Handmade Sneakers at Home
These instructions are based on the full shoe assembly transcript and have been cleaned up into a detailed, organized step-by-step guide. All timestamps and spoken-video filler have been removed. Repeat each step for the second shoe, paying close attention to any pattern pieces labeled left or right.
Before You Begin
This project uses a sneaker build kit from Shoemaker’s Academy or a similar DIY shoe kit. Depending on the kit version, some tools may be included and others may need to be purchased separately.
A complete build kit typically includes the pattern pieces, lasting board, outsole, insole, upper material, tongue material, toe tip material, thread, leather needles, eyelets, eyelet tools, punches, and a sole stitching awl. You will also need scissors and glue. Optional but helpful tools include a razor knife or X-Acto knife, low-tack painter’s tape, a punch pad or plastic cutting board, leather scissors, acetone, cotton rounds, 180-grit sandpaper, a respirator, plastic wrap or table covering, a heat gun, and a burnishing tool.
Work slowly and carefully. Many steps are repeated, and accuracy matters more than speed.
Step 1: Trace and Cut the Lasting Board
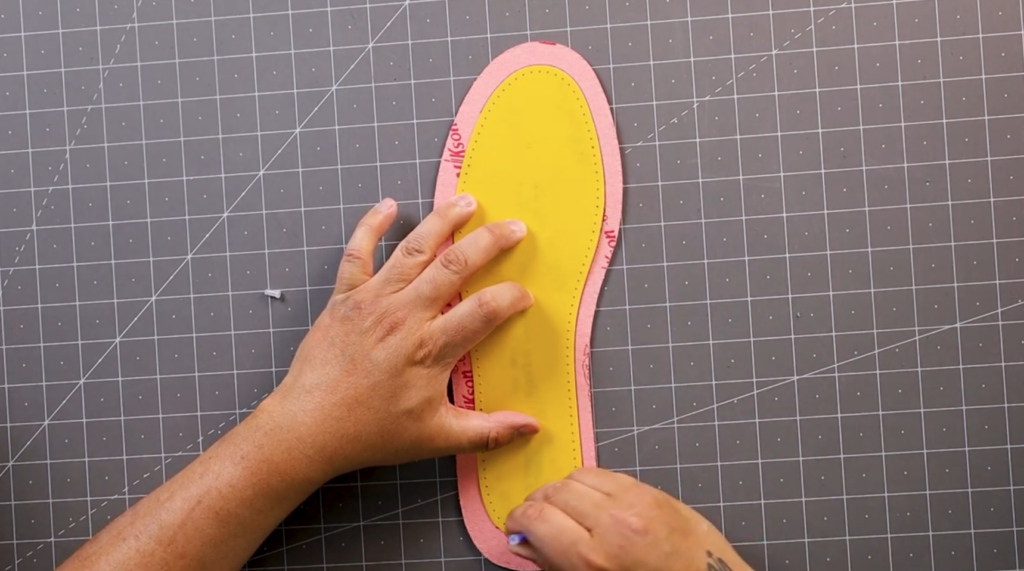
Start with the lasting board, footbed pattern, and heat-erasable marking pen.
Place the footbed pattern on top of the lasting board. If the pattern shifts while you are tracing, tape it down with low-tack painter’s tape or hold it in place with small weights.
Trace the entire footbed shape onto the lasting board. The pattern should also have four centering markers. Mark the corresponding holes next to those markers onto the footbed. These marks will help you center the upper later when the shoe begins to take shape.
Remove the pattern from the lasting board. Cut out the traced footbed shape using either a razor knife or scissors. There is no single correct cutting method. Use whichever tool gives you the most control. If using a razor knife, keep the blade straight up and down so the cut edge stays clean and even.
Set the cut lasting board aside.
Step 2: Trace and Cut the Insole
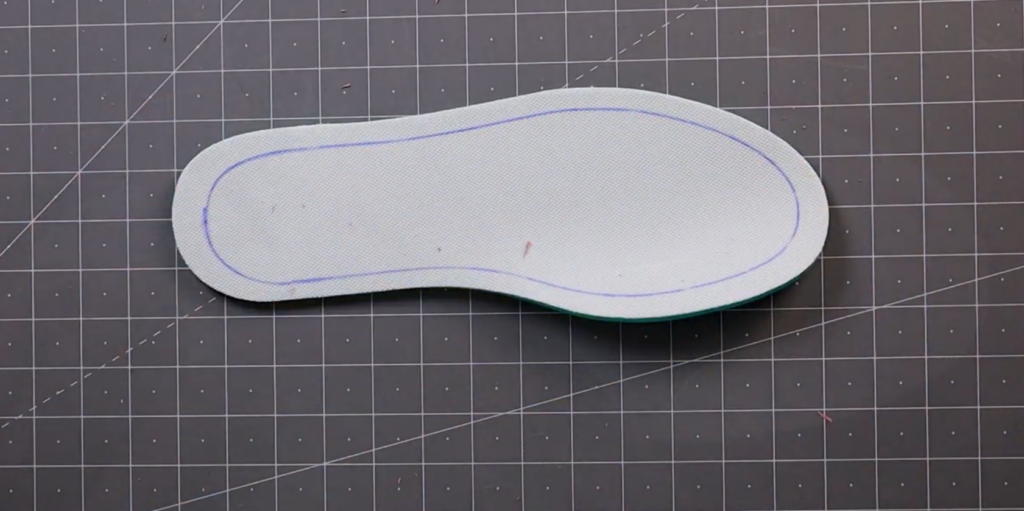
Grab the insole material from the kit and use the same footbed pattern.
Place the footbed pattern over the insole material. Tape or weigh it down if needed, then trace the shape.
Cut the insole using scissors or a sharp blade. Because insole material is soft, a sharp cutting edge will give the cleanest result and help prevent ragged edges.
Once the insole is cut, place it aside with the lasting board. You will not install the insole until the end of the project.
Step 3: Prepare the Tongue
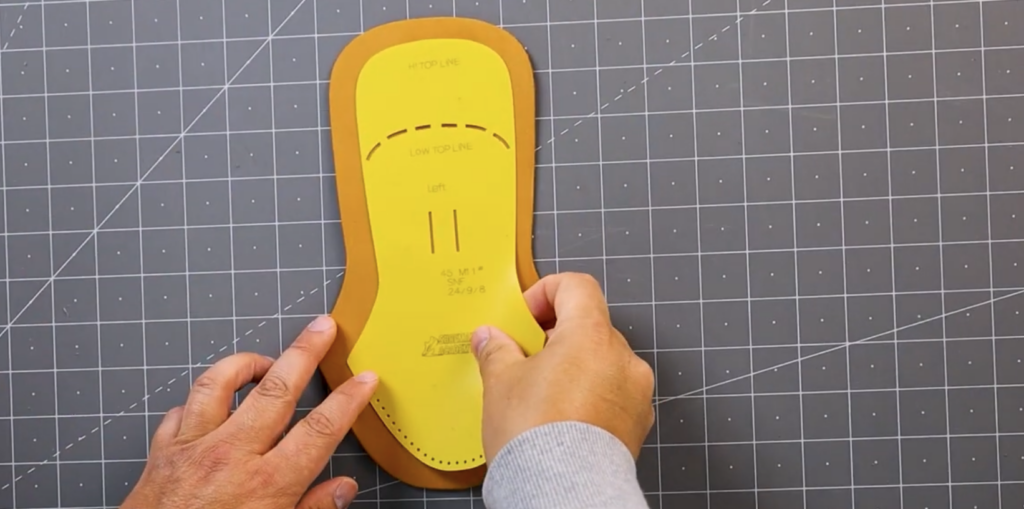
Grab the tongue material and the correct tongue pattern. Tongue patterns are left- and right-specific, so make sure you are using the correct pattern for the shoe you are building.
Place the tongue pattern over the tongue material. Tape it down with low-tack painter’s tape if needed.
Trace the tongue shape onto the material. For a low-top shoe, trace the low-top lines shown on the pattern. Also trace the two tongue keeper lines and mark all of the stitch holes along the bottom perimeter of the tongue.
Place the tongue material on a punch-safe surface, such as a punch pad or plastic cutting board. This protects your worktable and allows the punch to pass cleanly through the material.
Take the two-prong hole punch from the kit and line up the prongs with the first two marked stitch holes. Strike the punch with a hammer until you feel it make contact with the punch pad underneath. Press down on the pattern, then wiggle the punch out of the newly made holes.
Move the punch to the next two holes and repeat this process across the bottom of the tongue.
After punching, remove the pattern and check that every hole went all the way through the material. If any holes are incomplete, punch them again.
Next, cut the two tongue keeper slits along the marked lines. Use the top of the tongue pattern and the hashed guide lines to complete the tongue shape if needed.
Cut out the tongue. A good method is to slice both sides first, remove the excess side material, and then carefully cut the bottom and top edges with scissors or leather scissors.
Set the completed tongue aside.
Step 4: Trace the Inside and Outside Upper Piece
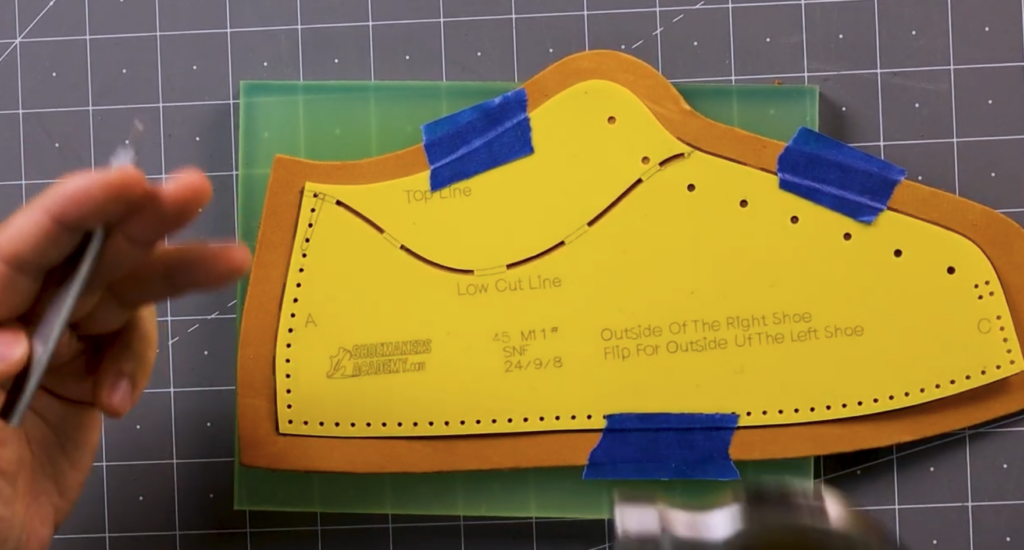
Grab the upper pattern labeled inside and the corresponding upper material. Remember that you must flip the pattern when making the matching piece for the opposite shoe.
Place the inside upper pattern over the upper material. Tape it down if needed. Trace the outer perimeter, low-top cut line if applicable, lace holes, and all stitch holes.
Set that traced piece aside.
Now grab the upper pattern labeled outside and the corresponding upper material. Again, remember to flip the pattern when making the opposite shoe.
Place the outside upper pattern over the material, tape it down if helpful, and trace the outside perimeter, low-top line, lace holes, and stitch holes.
At this stage, do not punch the lace holes yet. The lace holes require a different punch tool later.
Step 5: Punch the Stitch Holes in the Upper
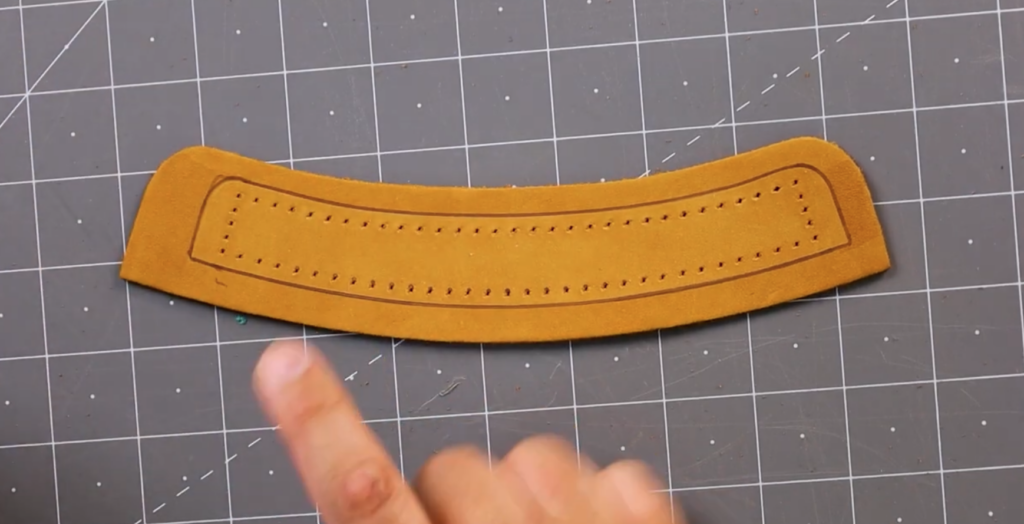
Place one traced upper piece over your punch pad or protected punching surface.
Choose a hole punch from the kit that matches the spacing of the stitch holes on the pattern. Some areas may work best with a single-prong punch, while others may work well with a multi-prong punch.
Line up the punch over the first stitch hole or group of holes. Strike with a hammer until the punch reaches the punch pad. Hold the material steady, press down, and wiggle the punch out cleanly.
Move to the next stitch hole and repeat. Continue around the full perimeter of the upper pattern. There is also a group of four stitch holes at the front of the pattern; punch those as well.
Repeat the same process for the other upper piece. When finished, all stitch holes on both upper pieces should be punched.
Set the upper pieces aside.
Step 6: Trace the Low-Top Lines and Cut the Upper Pieces
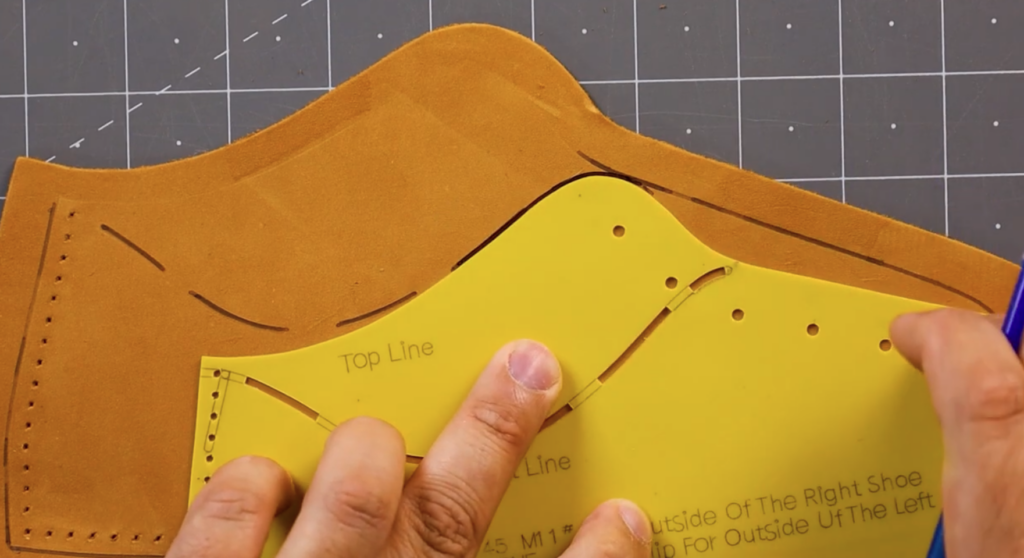
Remove the paper pattern from the upper material.
Use the top of the pattern to complete the hashed low-top cut lines at the front of the upper. You may freehand the rest of the hash lines if needed. At the back heel, make sure there is enough material above the top hole so the edge does not become too weak.
Cut the upper pieces out of the material. You can use a razor knife for the top, side, and bottom edges, or use scissors where they give better control.
For cleaner cuts, keep the razor knife vertical rather than angled. This helps the material edge look more level.
Repeat the process for each upper piece until all upper material has been cut.
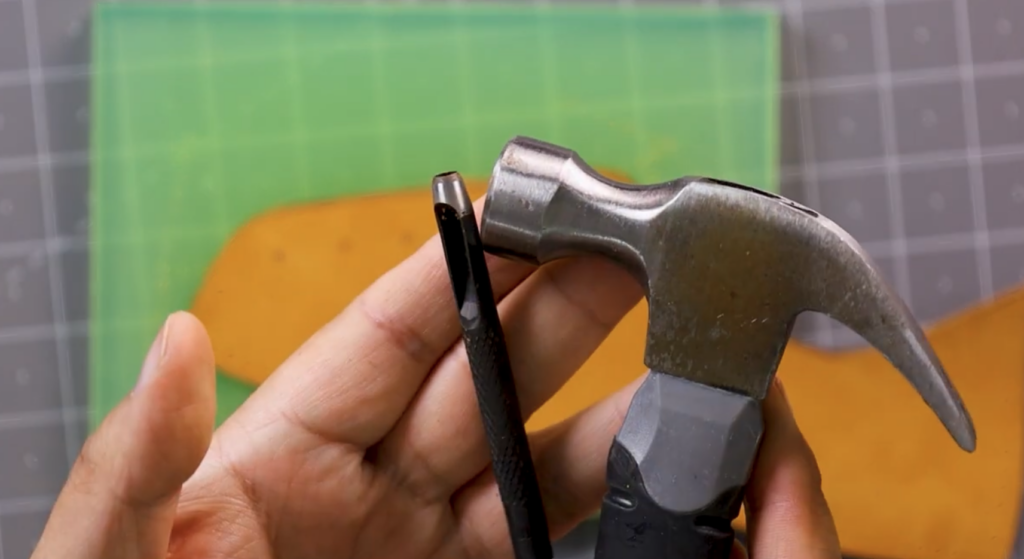
Step 7: Punch the Eyelet Holes
Place one upper piece on the punch pad.
Take the 5 mm eyelet punch from the kit and position it over one traced lace marker. Strike the punch with a hammer until it reaches the punch pad. Before lifting the punch, twist it slightly. This helps cut a clean circle.
Repeat for every lace hole on all upper pieces.
As you work, periodically remove the small material knockouts from inside the punch. If the punch becomes clogged, it will become harder to use and may create messy holes.
At the end of this step, all eyelet holes should be punched.
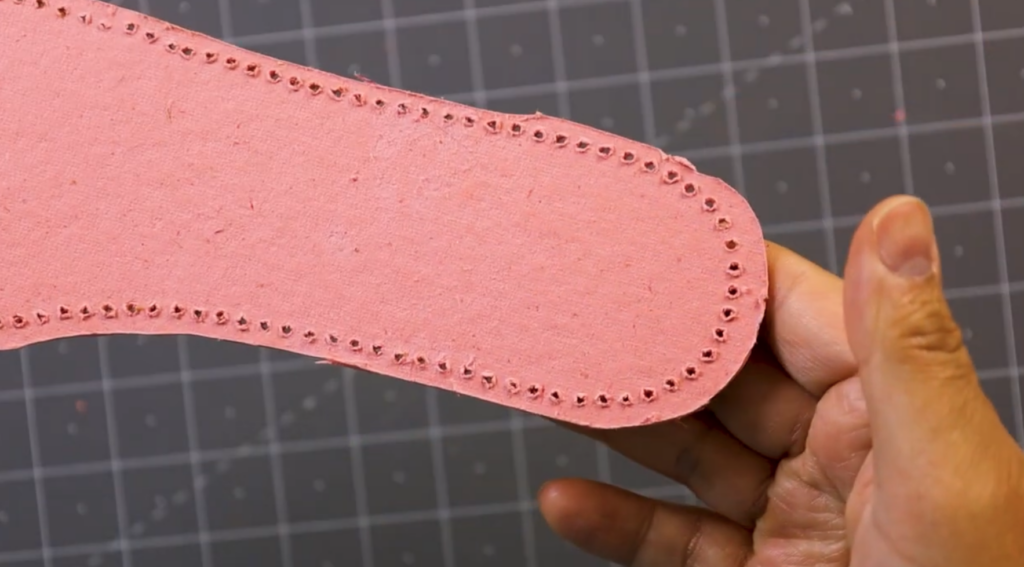
Step 8: Punch the Stitch Holes in the Lasting Board
Return to the lasting board and footbed pattern.
Place the pattern over the lasting board again. Tape the two together if needed so they do not shift.
Choose a punch that matches the stitch hole spacing around the footbed pattern. Starting at one hole, line up the punch and strike it with a hammer until it reaches the punch pad.
Move around the perimeter of the footbed, punching every stitch hole. This step takes time because there are many holes, so work patiently and make sure each hole is clean.
After punching, confirm that all holes go completely through the lasting board.
As an optional guide, transfer a line onto the edge of the footbed corresponding to each centering marker hole. This can help with alignment later when attaching the upper.
Set the lasting board and pattern aside.
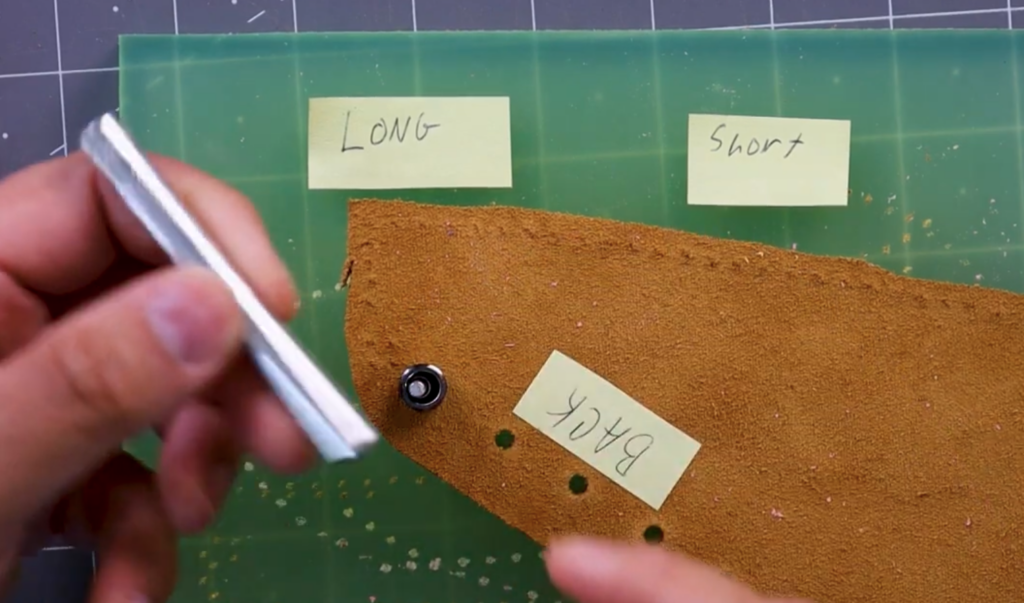
Step 9: Set the Eyelets
Gather the eyelet setting punch, eyelet setting base, and a packet of eyelets in your preferred color.
Each eyelet assembly has two pieces: one piece with a long neck and one piece with a short neck.
Take one upper piece and insert the long-neck eyelet through a punched lace hole from the front side of the upper. Flip the upper over onto the setting base so the eyelet sits properly through the tool.
Place the short-neck eyelet piece over the assembly with the bezel facing up. Place the setting tool over the eyelet assembly and strike the top with a hammer until the eyelet compresses securely.
Repeat for every lace hole on all upper pieces.
After setting, check each eyelet. It should be tight, smooth, and seated firmly against the material.
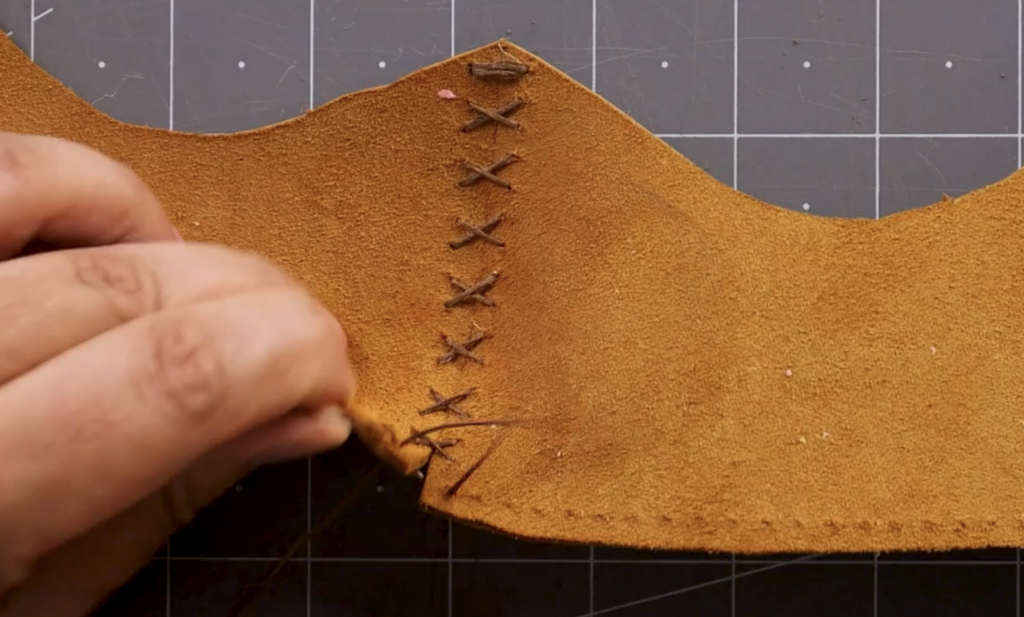
Step 10: Stitch the Inside and Outside Upper Together at the Heel
Grab your sewing kit, preferred thread color, and two leather needles. The original tutorial used a straight 2.5-inch needle and a 1.75-inch needle, but you can use whichever needles feel most comfortable.
Cut roughly three feet of thread. Thread one needle on one end and the second needle on the other end.
Take the inside and outside upper pieces for one shoe. Flip them to the back side and line up the top heel holes.
Starting from the back side, pass one needle through the top hole of one upper piece and pull some thread through. Pass the other needle through the corresponding top hole of the other upper piece. Pull both sides evenly so each needle has roughly the same length of thread.
Flip the uppers to the front side. Take one needle and pass it through the opposite corresponding hole, then pull the thread taut. Take the other needle and pass it through the opposite corresponding hole. This creates a sturdy lock stitch.
Flip the uppers to the back side and repeat the same lock stitch for added strength.
Now begin the cross-stitch pattern. From the front side, take one needle and pass it through the opposite upper one hole down. Repeat with the other needle. You should see the first X-shaped stitch.
Flip the upper to the back side and repeat the process in the next two open holes. Continue alternating sides, always taking each needle through the opposite upper one hole down.
As you stitch downward, the upper will begin to form a three-dimensional curve. Keep your tension even. The thread should be snug, but not so tight that it distorts the material.
When you reach the last cross stitch, create another lock stitch at the bottom, just as you did at the top. Pass one needle through the opposite hole, then pass the other needle through its opposite hole. Flip the upper and repeat. For extra strength, you may repeat the lock stitch two more times.
Remove the needles, tie a knot, and trim the thread ends.
The heel of the upper is now attached.
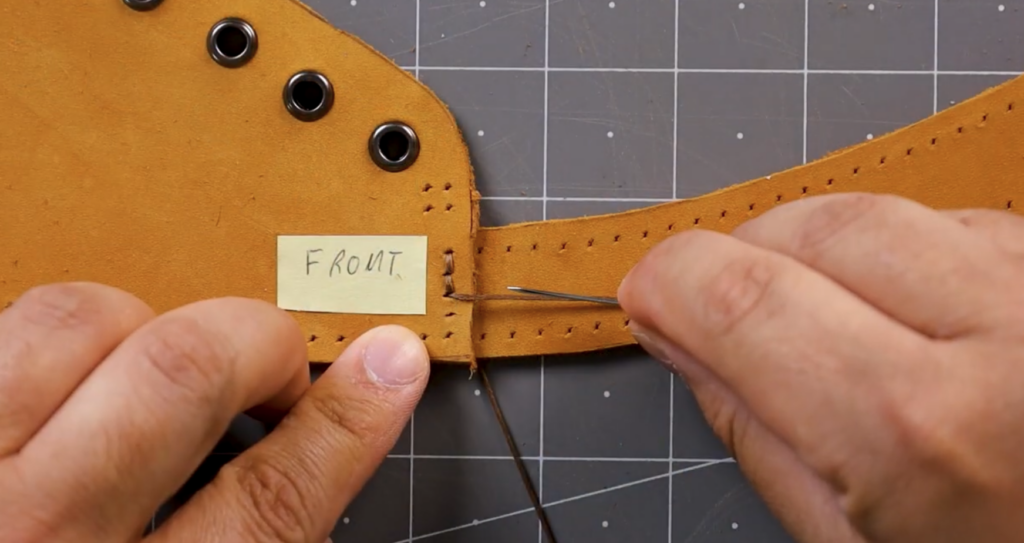
Step 11: Attach the Toe Tip to the Upper
Grab two leather needles and roughly 12 inches of thread in your preferred color. Thread one needle onto each end.
Take one toe tip piece and one stitched upper assembly. With the curve of the toe tip facing up, place one side of the toe tip underneath the corresponding side of the upper.
Pass one needle through the front top hole of both pieces. Pass the other needle through the second hole of both pieces. Pull the thread evenly so both sides are about the same length.
Flip to the back side. Take the top thread and pass it down into the hole below that already has thread in it. Take the other needle and pass it through the empty hole below.
Flip to the front side. Pass the top thread through the hole below it. Pass the next thread through the hole below it.
Flip to the back side again. Continue this same pattern, moving downward one hole at a time.
At the bottom, pass the needle from the bottom into the hole above it, but only through the upper material. It should exit between the two layers of material. Pass the other needle from the front side into the bottom hole the same way, again going only through the upper material.
Pull the threads taut, remove the needles, tie a knot, and trim the excess.
Repeat the same process on the other side of the toe tip.
At the end of this step, the upper should be complete except for the tongue.
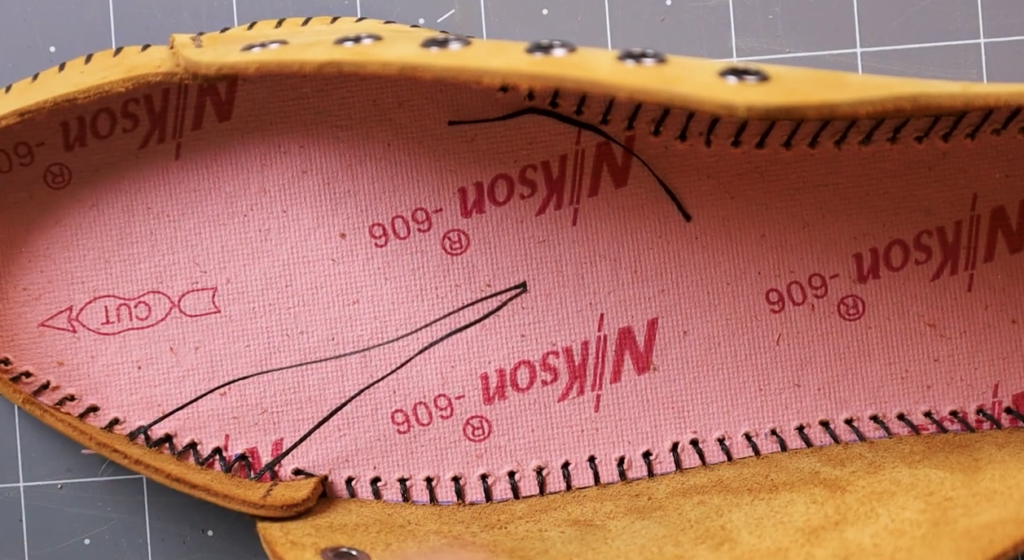
Step 12: Sew the Upper to the Lasting Board
Choose a thread color that does not need to be visible from the outside of the shoe, because this thread will later be hidden under the insole.
Measure and cut about 10 feet of thread. Bring the thread ends together so both sides are even.
Thread one end through a needle. Pass that needle through one heel hole in the lasting board that corresponds with the centering marks. Thread the other end through the needle and pass it through the other heel hole that corresponds with the centering marks.
Pull the thread evenly so each side has about the same length.
Place the matching upper over the lasting board and center it using the two centering holes. The upper should wrap around the perimeter of the board, not sit flat on top of it.
Pass the needle through the first hole on the upper. From inside the upper, pass the needle down into the next hole in the lasting board. Pull taut, then pass through the next hole in the upper. From inside the upper, pass down into the next hole in the board.
Continue this same pattern: upper hole, board hole, pull taut, next upper hole, next board hole.
This is a long step, and the motion repeats all the way around the shoe. Keep checking that the upper stays centered and follows the edge of the board.
When one end of the thread runs out, return to the heel, thread the needle onto the other half of the thread, and complete the other side.
Continue until the two stitched sections overlap. Once both thread ends are inside the shoe, unthread the needle and trim the excess. You can leave a little slack because the thread will be covered by the insole.
The upper is now fully stitched to the lasting board.
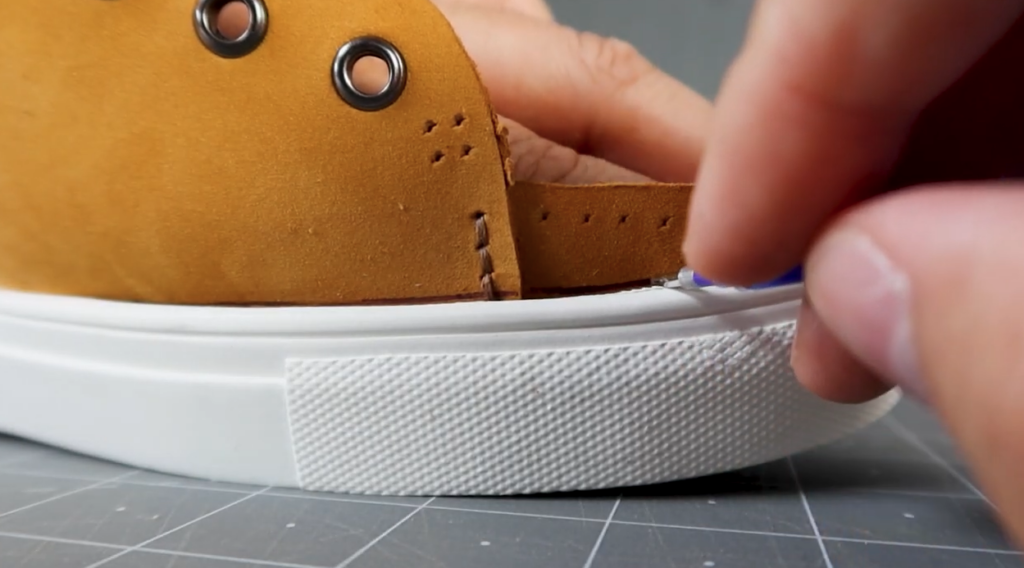
Step 13: Dry Fit the Outsole
Grab the outsole and place the stitched upper and lasting board assembly inside it.
Push the upper toward the front of the outsole. Using the heat-erasable or invisible ink pen, mark where the top edge of the outsole meets the upper around the front third of the shoe.
Apply pressure behind the upper as you trace so the material sits properly against the outsole.
This process is called dry fitting. It creates a guideline that tells you where to apply glue and how far the outsole should come up the upper.
You may notice a gap at the heel during the dry fit. This is normal. The outsole will be shaped up toward the upper during bonding.
After tracing the front section, shift the upper toward the heel and trace the rest of the upper.
Set the upper aside.
Step 14: Prep the Outsole for Bonding
This step is optional, but it improves the chance of a strong bond.
Protect your table with a towel or work covering. Use 100% acetone and cotton rounds to clean the entire inside wall of the outsole.
Next, lightly sand the entire inside wall using 180-grit sandpaper. The goal is not to remove a lot of material, but to scuff the surface so the glue can grip better.
After sanding, clean the inside wall again with acetone on a fresh cotton round. Let the outsole dry completely before applying glue.
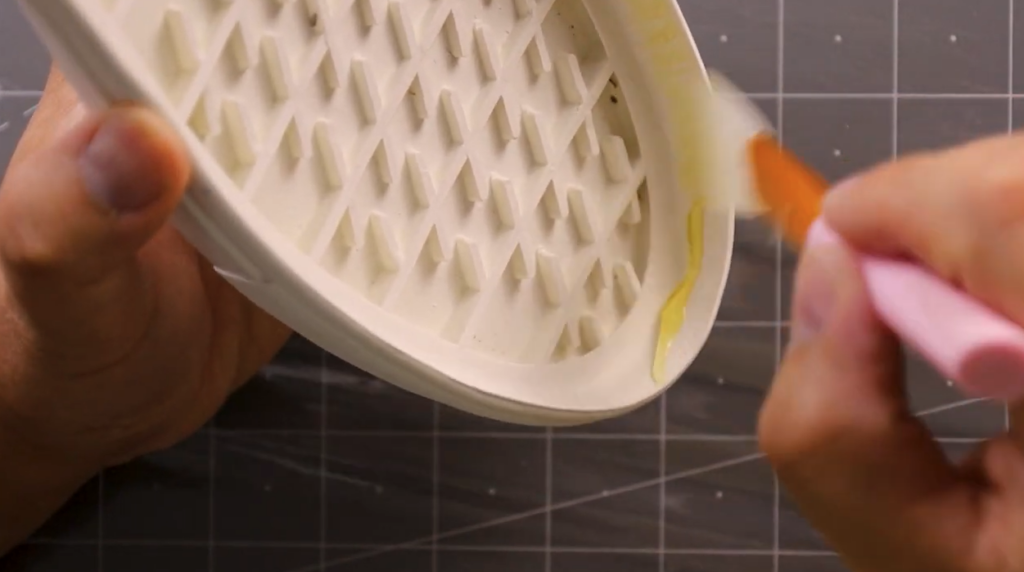
Step 15: Apply Cement Glue
Do this step in a well-ventilated area. Contact cement and shoe glue can produce strong fumes. Open a window and wear a respirator if possible. Protect your work surface with plastic wrap, paper, or another disposable covering.
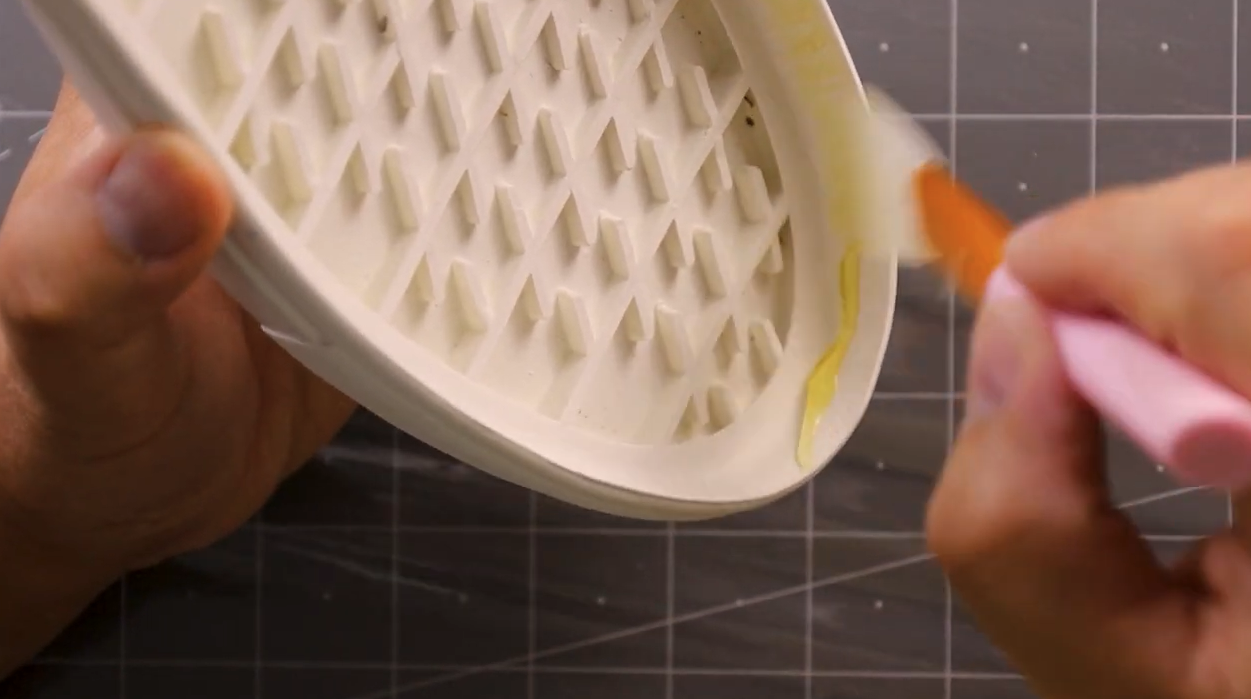
Apply cement glue to the inside wall of the outsole. Make sure the glue reaches all the way up to the top rim. You can use the brush included with the glue, a squeeze bottle, or a silicone applicator.
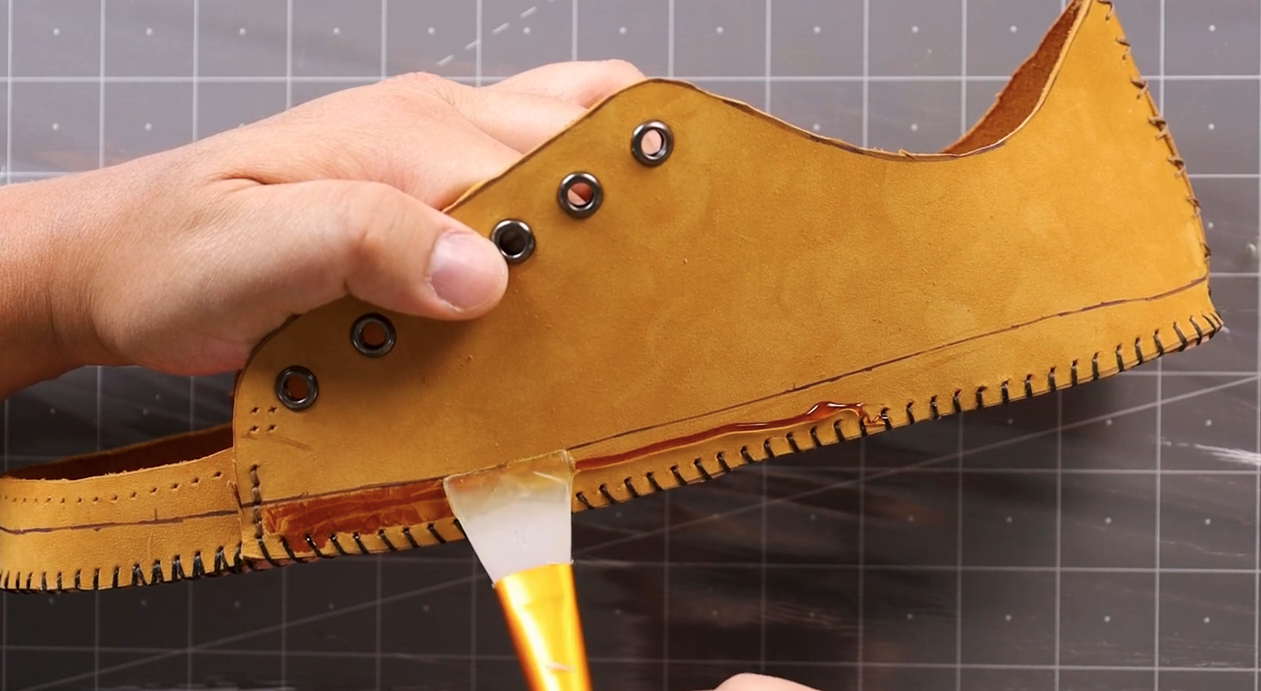
Once the entire inside wall of the outsole is coated, apply glue to the upper. Spread glue under the guideline you traced during dry fitting. The glue should cover the full area below that guideline around the entire perimeter of the upper.
Set a timer for at least 20 minutes and allow the glue to cure.
After the first coat has cured, apply a second coat to both glued areas for extra strength. Let the second coat cure for at least 20 minutes before bonding.
The glue should be dry to the touch before you continue.
Step 16: Bond the Upper to the Outsole
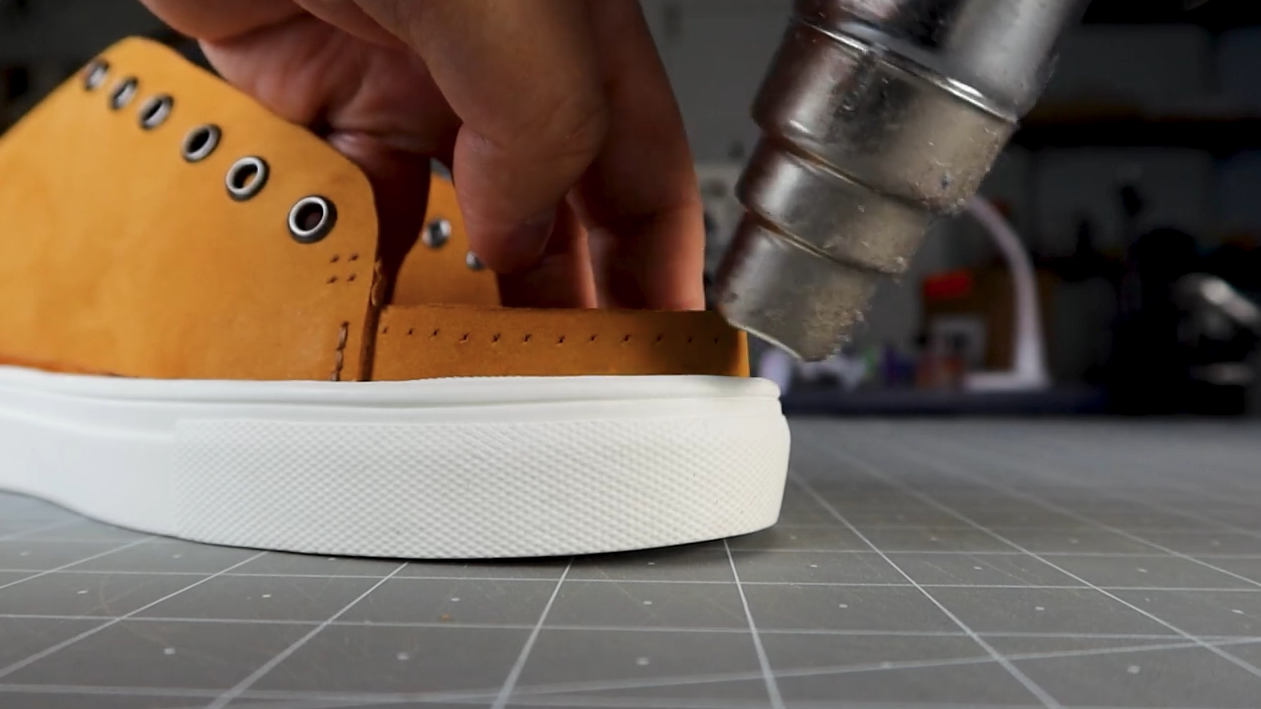
Set your heat gun to a low setting. In the transcript, the heat gun was set to approximately 250°F.
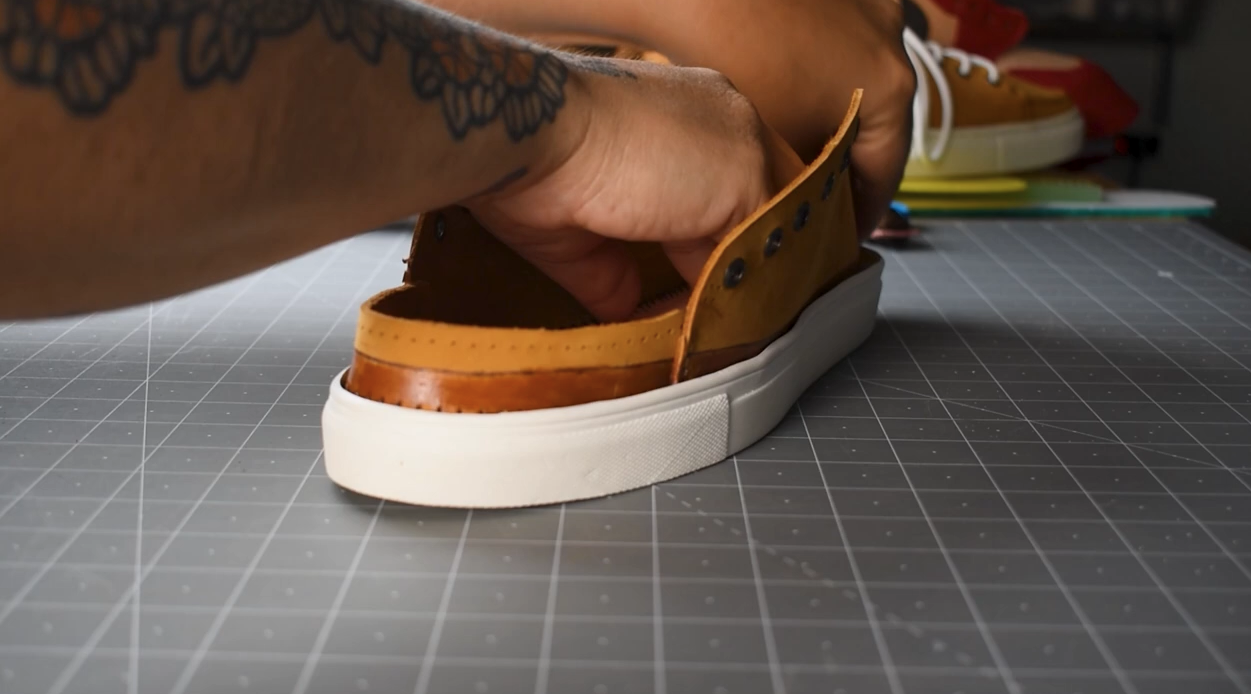
Once the cement glue has cured and is dry to the touch, place the upper into the outsole just as you did during dry fitting. Shift the upper toward the front of the outsole.
Apply heat to the inside tip of the outsole for about five seconds. Then press the top of the outsole and the top of the glue line on the upper together for five to ten seconds. That section should now be bonded.
Move to a small section next to the new bond. Heat it for about five seconds, then press it together for five to ten seconds.
Continue working in small sections. Heat, press, hold, and move to the next section.
Once you reach the end of the toe tip on one side, return to the front and work toward the other end of the toe tip. Keep the top of the traced guideline aligned with the top edge of the outsole, especially around the curves.
After both sides of the toe tip are bonded, move to the heel. Heat the inside heel of the outsole for about five seconds, then press it to the upper for five to ten seconds.
The heel has more tension because the outsole is being shaped up to the upper. Keep pressure on the bonded heel section while heating the next section. This helps prevent the heel bond from pulling apart.
Work around the heel curve on one side, then return to the center heel and work around the other side.
Finally, complete the remaining side sections from the heel toward the front bonds. Once both sides are fully bonded, the outsole attachment is complete.
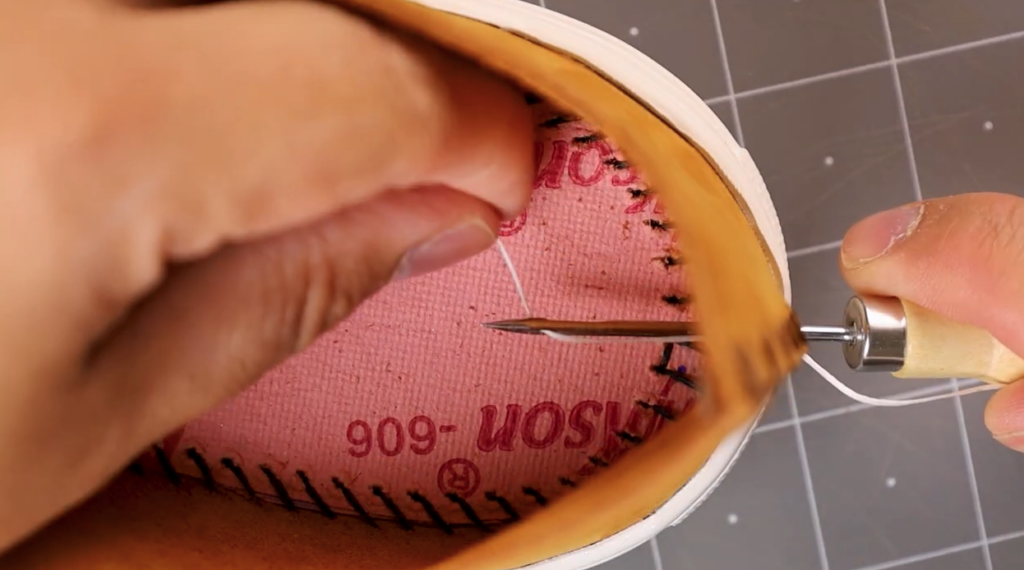
Step 17: Stitch the Outsole
Grab the stitching awl and your preferred thread color.
Measure two thread lengths at about five feet each.
Thread the stitching awl down to the handle length. Pierce the needle through the outsole at the center heel. Pull the needle about halfway out to create a loop inside the shoe.
Hold the short end of the thread against the awl handle with your thumb. Pull the long length of thread all the way into the shoe. Pull the entire thread out of the needle, then remove the stitching awl.
This creates your back-stitch thread. You should have about six inches of thread sticking out of the outsole and the rest inside the shoe.
Now take the second five-foot thread. Thread the stitching awl down to the handle length again. Pierce through the same heel hole. Pull the needle halfway to create a loop inside the shoe.
Pull the short length of thread inside the shoe, leaving the long length outside. Hold the inside thread as you pull the stitching awl out. The thread should remain attached to the stitching awl.
Now begin stitching around the outsole. Stitch length is up to you, but the tutorial suggests roughly half-inch stitches. The important thing is consistency.
Pierce the next hole or next stitch location with the awl. Pull halfway to create a loop. Shape the loop so it sits on the same side of the needle as the previous stitch.
Pull the entire back-stitch thread through the loop. Once it passes all the way through, pull out the stitching awl. Pull the stitch until it is neatly taut.
Repeat the process: pierce, make a loop, pull the back-stitch thread through the loop, remove the awl, and tighten.
Continue all the way around the outsole. If you run out of thread, start the next hole with a fresh piece of thread and continue using the same method.
When you reach the first thread again, pull the remaining thread ends inside the shoe. Cut the ends evenly. The exact length does not matter because they will be hidden under the insole.
The outsole stitching is now complete.
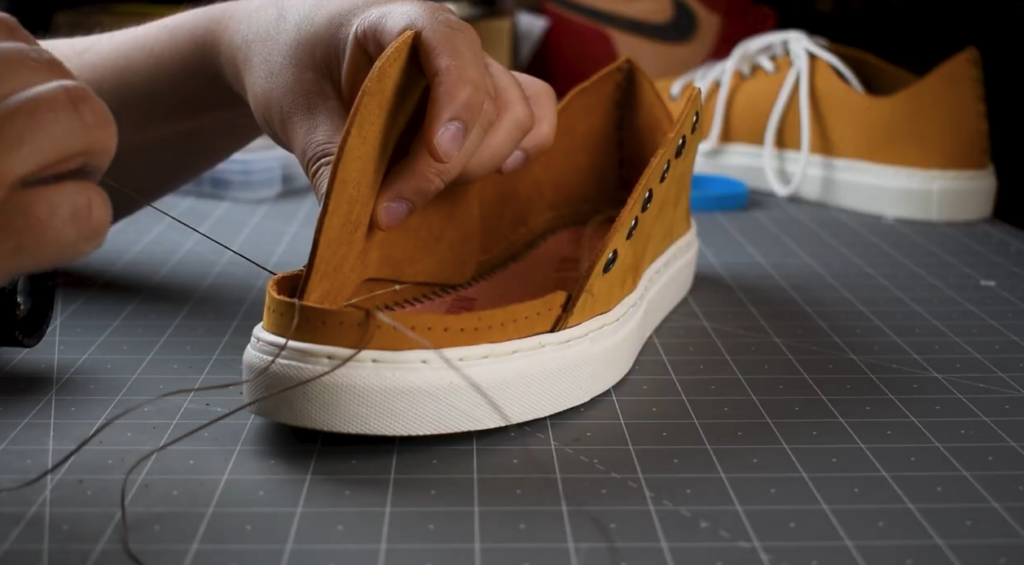
Step 18: Stitch the Tongue Into Place
Grab two leather needles. A curved needle may make this step easier, but a straight needle can also work.
Cut about five feet of thread in your preferred color. Thread one needle onto each end.
Line up the first hole on the tongue with the top hole of the toe tip stitch. Push one needle through the top hole of the toe tip stitch, then through the first hole of the tongue.
Take the other needle and pass it through the next hole on the toe tip and the next hole on the tongue. Pull the thread so both sides are even.
Stitch from the first hole into the second hole and out the front. Bring that same needle into the next hole through both materials.
Continue using a leapfrog-style stitch: bring the first stitch through the second, then back into a new hole. Repeat this all the way across.
Keep the threads taut as you work. This helps shape the front of the shoe and gives the toe area a rounded form.
Once you bring the last stitch out, thread it back to the previous hole to create a lock stitch. Remove the needles, cut the threads, and tie a knot.
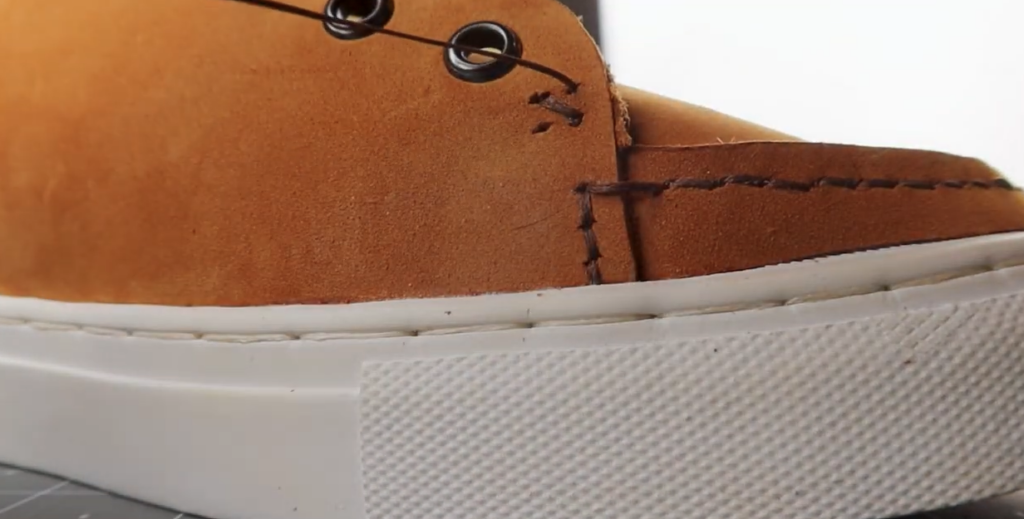
Step 19: Lock the Tongue on Each Side
To hold the tongue in place, add a simple cross stitch on each side.
Use the invisible ink pen to mark where the upper holes land on the tongue. Mark the holes on both sides of the tongue.
Using the stitching awl, pierce through the four marked holes on each side of the tongue.
Cut two pieces of thread, each about 18 inches long. Thread one needle on each end of the first thread.
Starting from the inside of the shoe, pass one needle through the tongue and upper. Pass the other needle through the opposite hole in both materials.
Now pass one needle across to the opposite hole, creating the first stitch line. Pass the other needle across the opposite hole to reinforce that stitch line.
From inside the shoe, bring one needle out through one of the empty holes. Bring the other needle out through the last empty hole.
Pass one needle across to the opposite hole to create the second stitch line. Pass the last needle across the opposite hole to reinforce that stitch line.
Remove the needles, tie a knot, and trim the excess.
Repeat the same process on the other side of the tongue.
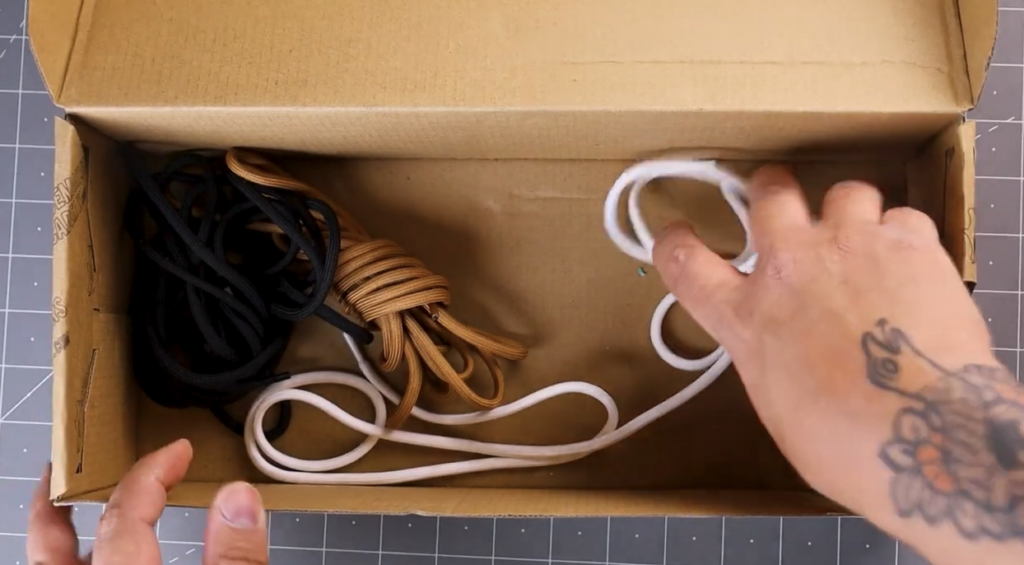
Step 20: Add the Insole and Laces
Take the insole you cut earlier and fit it into the finished shoe. Make sure it sits flat and covers the hidden stitching inside.
Choose your preferred lace color from the kit. Lace the shoe using your preferred lacing method.
Check the shoe carefully. Trim loose threads, make sure the tongue sits centered, confirm that the eyelets are secure, and inspect the outsole bond.
Repeat the complete process for the second shoe, remembering to flip pattern pieces where required and use the correct left or right components.
When both shoes are complete, you will have a finished pair of handmade sneakers.