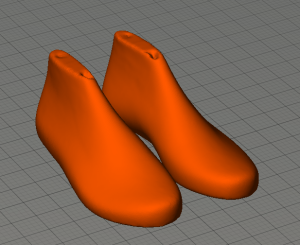
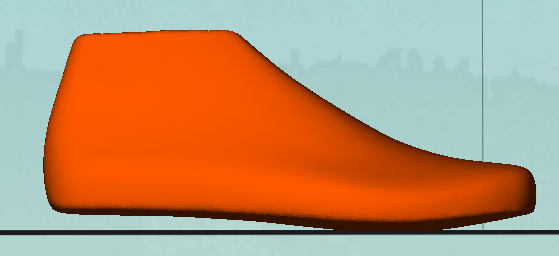
How to 3D Print a Shoe Last
Learn How to 3D Print a Shoe Last: 4 easy steps

 #2. Now that you have your last file you should break it up so you have one side. I don’t recommend that you print two lasts at one time. Not many machines are large enough to 3D print a pair of shoe lasts at the same time anyhow. In fact you may have to break up the last to fit a full lize last into your 3D printers build envelope. If you need to break up the last try printing with the heel down, then the other side with toe down. This will give you an accurate surface to bond the 3D printed lasts together in the middle.
 #3. Stand it up, we have found that printing you shoe last heel down pointing straight up is the best way to go. We set up our Makerbot Z18 to Print with 0% inside fill, 2 shells, rafting ON and exterior support ON. We were not so sure how clean the last would print but after a 1/4 size tested with great results, we went full size.
Here you can see the raft and support on our 3D Printed Men’s 9 test is very small. I was worried the last would pop off during the print but the Z18 build plattform adhesion is excellent If you need a more durable last for your project then we suggest you fill you 3D printed last with resin or expanadable foam. You could also Incease the shell thickness or add some fill (even 5% will make a big difference)
#4. Post finishing your 3D printed last. The Toe tip printed very clean and the heel just needed a little touch up to smooth away the support structure.
We plan to use this 3D orinted to tape some up some patterns as we start up some new designs for 2017. See how to tape a last and draw patterns here.
 Learn How to 3D Print a Shoe Last: 4 easy steps

#1 Get your File
You will need a .STl or other CAD file to print a shoe last. You can download our sneaker last file Here or you can search Thingverse or you can check out CRABCAD.
These are .stl files, so if you need a size other that US 9 you maybe in for some CAD work. Most CAD programs will allow you to make a surface Mesh from the .STL files. It will take some time to get the last modeled. Really tricky if you need to make a size change. Shoe lasts don’t resize or “Grade” in a linear fashion.
#2 Get ready to print
Now that you have your last file you should break it up so you have one side. I don’t recommend that you print two lasts at one time. Not many machines are large enough to 3D print a pair of shoe lasts at the same time anyhow. In fact you may have to break up the last to fit a full lize last into your 3D printers build envelope. If you need to break up the last try printing with the heel down, then the other side with toe down. This will give you an accurate surface to bond the 3D printed lasts together in the middle.
#3. Stand it up.
We have found that printing you shoe last heel down pointing straight up is the best way to go. We set up our Makerbot Z18 to Print with 0% inside fill, 2 shells, rafting ON and exterior support ON. We were not so sure how clean the last would print but after a 1/4 size tested with great results, we went full size.
Here you can see the raft and support on our 3D Printed Men’s 9 test is very small. I was worried the last would pop off during the print but the Z18 build plattform adhesion is excellent If you need a more durable last for your project then we suggest you fill you 3D printed last with resin or expanadable foam. You could also Incease the shell thickness or add some fill (even 5% will make a big difference)
#4. Step 4 Post Finishing
Post finishing your 3D printed last. The Toe tip printed very clean and the heel just needed a little touch up to smooth away the support structure.
We plan to use this 3D printed to tape some up some patterns as we start up some new designs for 2017. See how to tape a last and draw patterns here.


