How to Make a Shoe Last
Can you make a shoe last at home?
Yes, you can make a shoe last at home! In this article, we will review the basic techniques you can use to make a shoe last. If you have a custom shoe project in mind for yourself, or need a shoe last for a DIY or school project, you can use these techniques.
There are several ways that you can make a last for your shoe projects.
1. Carve the shoe last from wood or foam.
2. Build the last from stacked wood or cardboard.
3. Make an Alginate™ foot casting in a box mold.
4. Make a shoe last inside a foot form with plaster gauze.
5. Use a 3D printer to make a shoe last.
Carve the shoe last from wood


This process is very time-consuming. If you have access to CNC equipment at a MakerSpace or a school woodshop you may choose to do the rough cutting using the machinery and then finish by hand.
Build a shoe last with stacked wood or cardboard

If you have access to a laser cutting machine you can use this machine to save time and make a very clean last. Once you have the cardboard stacked and glued together, a few coats of varnish or resin can harden the surface and make the cardboard last easier to handle.
Here is a link the slicer software: Fusion 360 – Slicer
Build a shoe last with Alginate™ cast in a box mold.
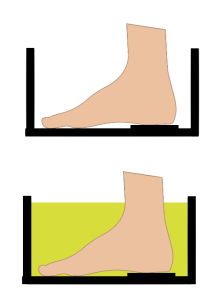
Alginate™ is a flexible casting material used in the dental and biomedical field. It is easy to use and non-toxic. To make an Alginate™ casting you will need about two pounds of the material. It’s easy to get Alginate for your shoe lasting project from Amazon. To make the last casting you will need a box, wood is best but you can also use cardboard. Alginate is water-based so you need to be careful that your mold box does not turn into a soggy mess. Preparation is easy but you are going to need a helper. A pair of rubber gloves are not required but will help you reduce the mess. Build your foot casting box. Make the box fit close to your foot but make sure to leave an inch or 30mm around your foot, your helper will need this space to apply the Alginate.
To prepare you should apply Vaseline or another petroleum jelly all over your foot, this will make it easier for you to slide your foot out at the end. For men – you must shave the hair off your foot! Removing your foot will be painful if you skip this step. A plastic bag can also be wrapped around your foot but I would not recommend this as it will make your casting wrinkled.
To apply the Alginate, first, pour some into the bottom of your box, then cover your foot. Alginate sets very quickly. In just a few minutes the Alginate will be firm. You can now gently start flexing your foot to remove it from the mold. Go slow and be careful not to tear the mold.
The top edge may tear but don’t worry.

Cast a shoe last in a mold made from plaster gauze.
 Plaster gauze is another great way to make a casting of your foot. You will need a helper for this project as it can get a bit messy. The process is simple. First, prepare your foot by shaving off the hair and then apply Vaseline petroleum jelly to stop the plaster from sticking.
Wet the plaster and apply it to the foot, you should be seated with only a little weight on your foot. Don’t wrap the plaster too high as getting the casting off can be a bit tricky.
Once the plaster is on, it will take a while to set up. You will feel some
  heat but it’s not dangerous. When you feel the plaster getting firm it is time to remove the casting. You will need to carefully trim down the side of the plaster casting. A small pair of scissors with tape on the point can be used.
Go slow and trim just a little at a time until you can slip your foot out. It is a good idea to save a patch or two of the plaster gauze to make any repairs.
Once you have the mold you can pour resin into the mold. To remove the last you will need to cut away the plaster casting.
After some hand finishing, you can use your foot casting to make your DIY shoe project.
Build a shoe last with a 3D printer
 If you have access to a decent-sized 3D printer you can print this last full size in about 5 hours. We have a really slick MakerBot Model Z18 on hand so we tested the file. We printed the sneaker last with 0% fill, 2 shells, and scaled to 275mm long for USA men’s size 9. With 0% fill the last is fragile but perfect for filling with expandable foam, casting resin, or plaster for a more durable last.


