
Sole Stitching Your Quilted Sneaker
Use sole stitching to secure the upper to the outsole. This sewing technique works for quilted and leather sneakers. You can use this process to attach the upper directly to the rubber outsole, or to secure the upper after it’s been glued to the outsole.
Join Wade down in the workshop as he completes our Holiday sneaker project.
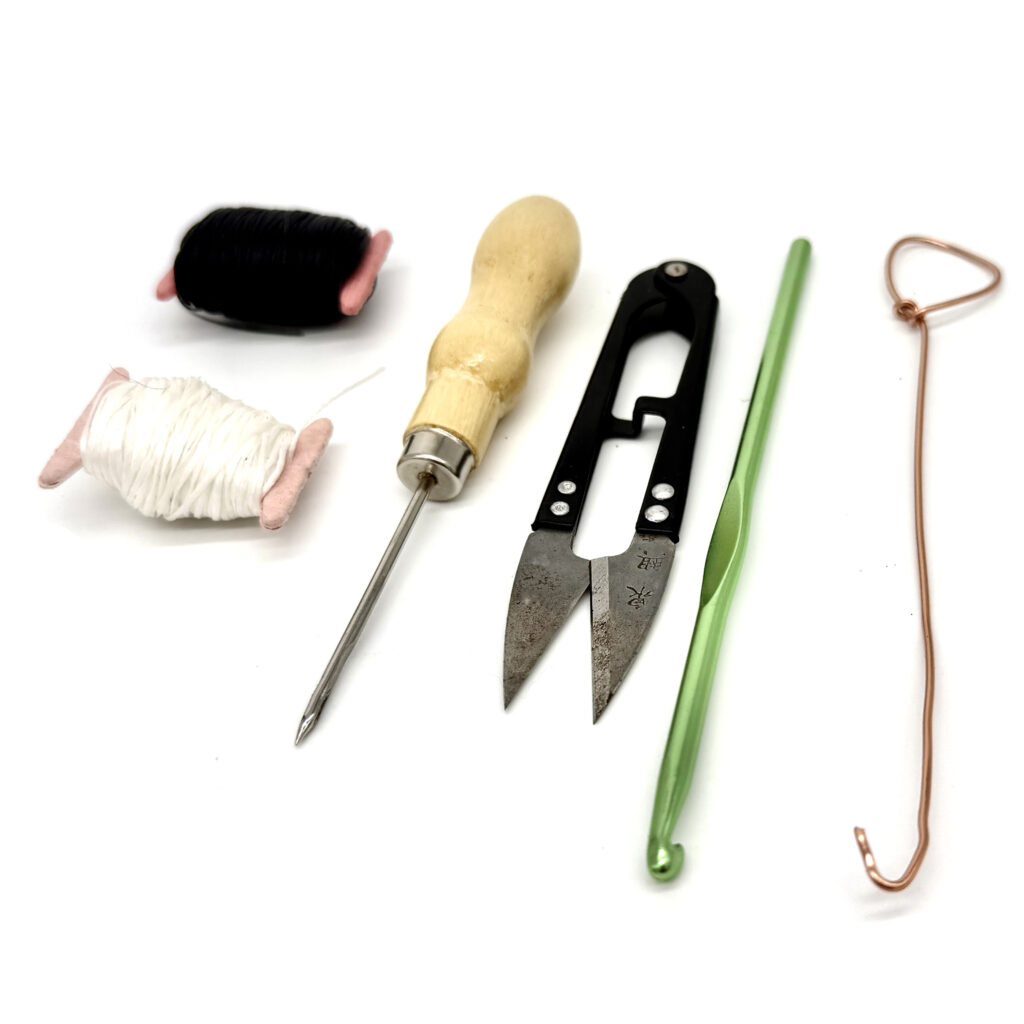
Tools you will need:
Strong waxed thread
Awl needle or Speedy stitcher
Thread nippers
Crochet Hook
or DIY wire hook.
Sole Stitching Step-By-Step
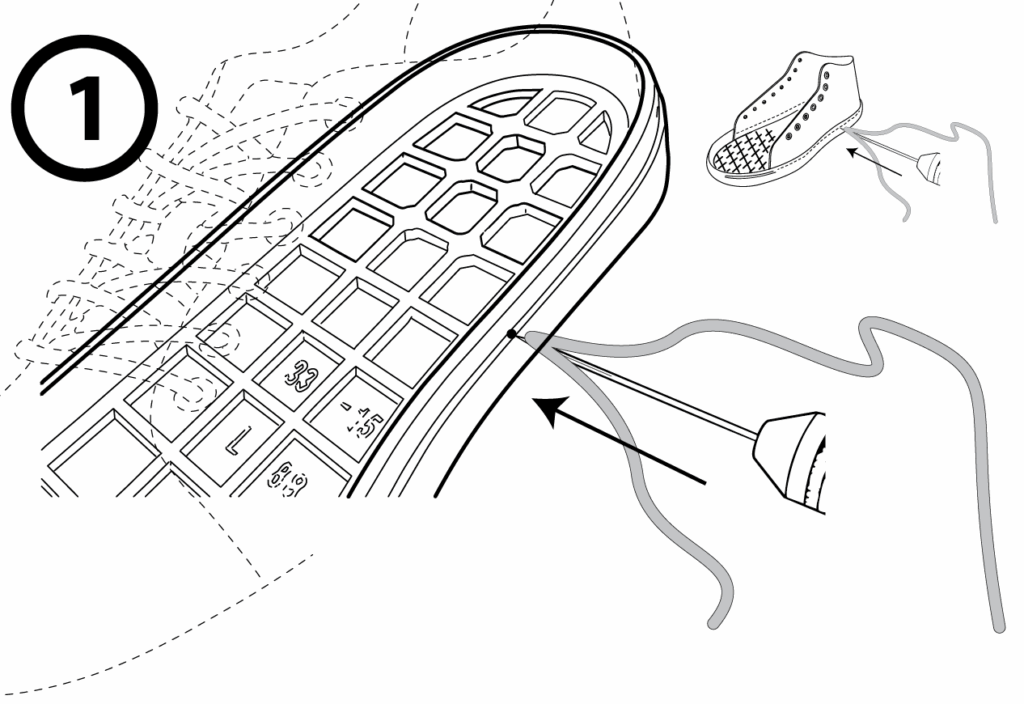
Start with 60 inches of waxed thread. This will be three of four loops around the outsole.
Thread the awl needle.
Insert the awl needle, then feed about 20 inches of thread inside the shoe. This is your bobbin or “inside” thread.
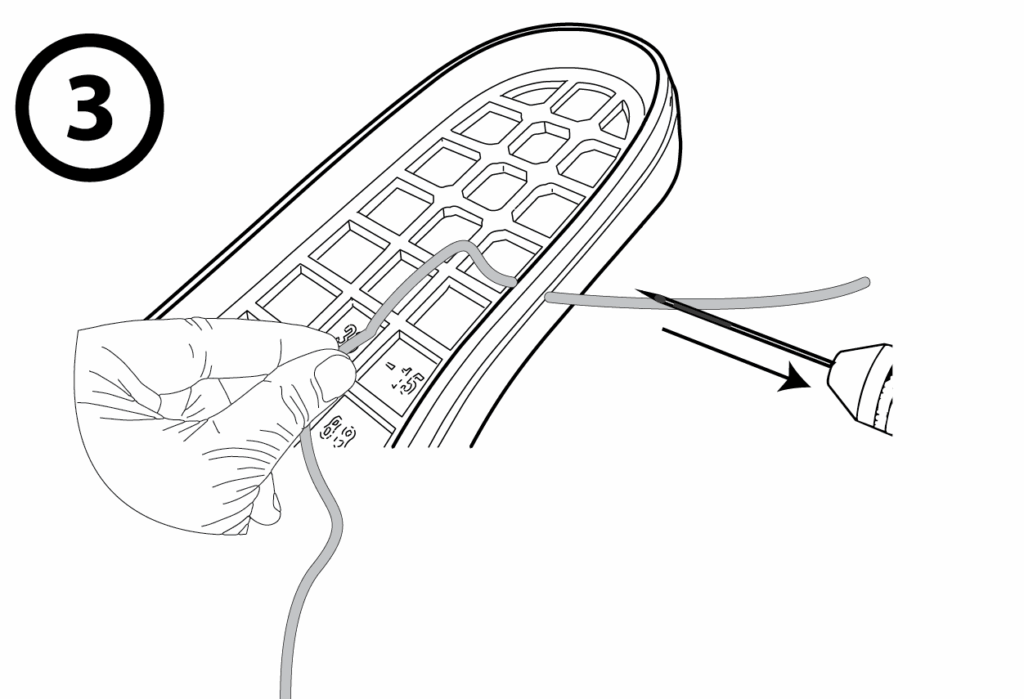
Withdraw the sewing awl. Make sure to keep the thread inside the needle.
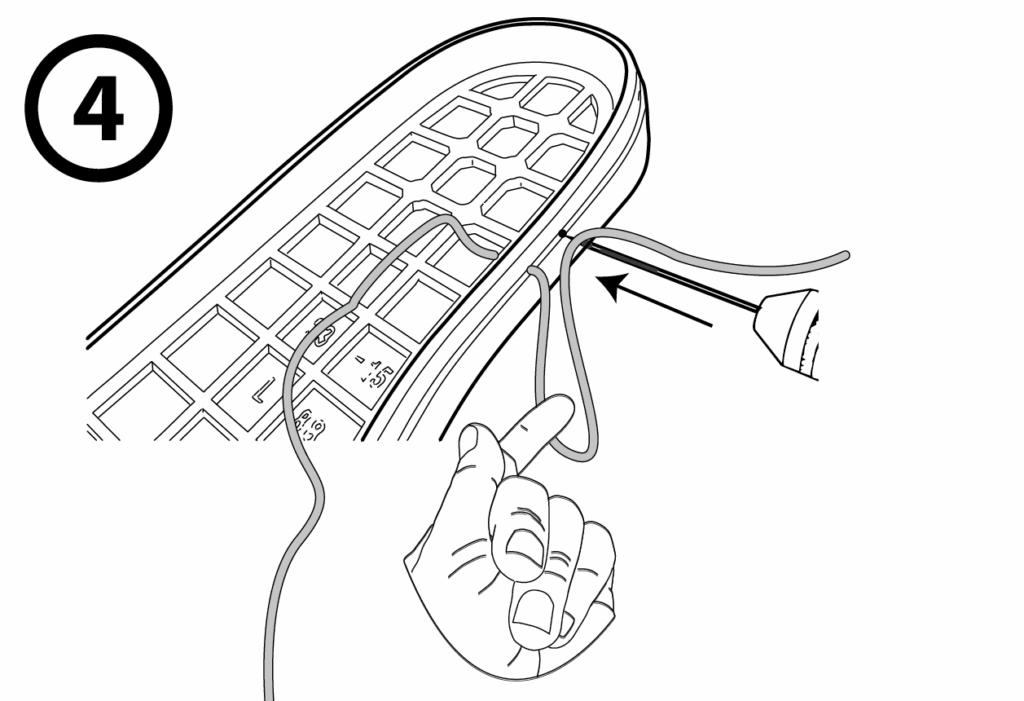
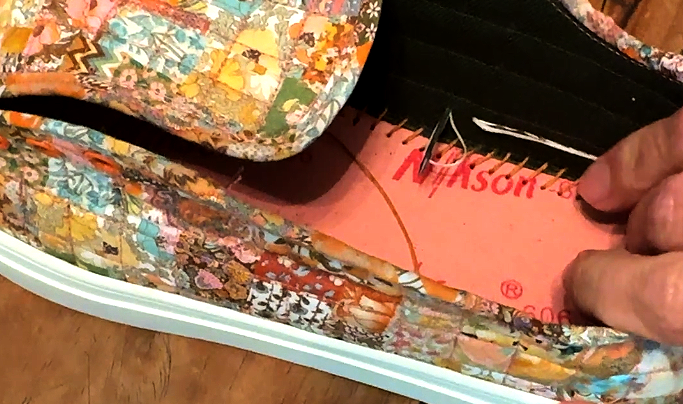
Create a small loop and insert the needle in the outsole channel to make your first stitch. You can make the stitch every 1/4 inch or use the width of your finger to measure the length of your stitches.
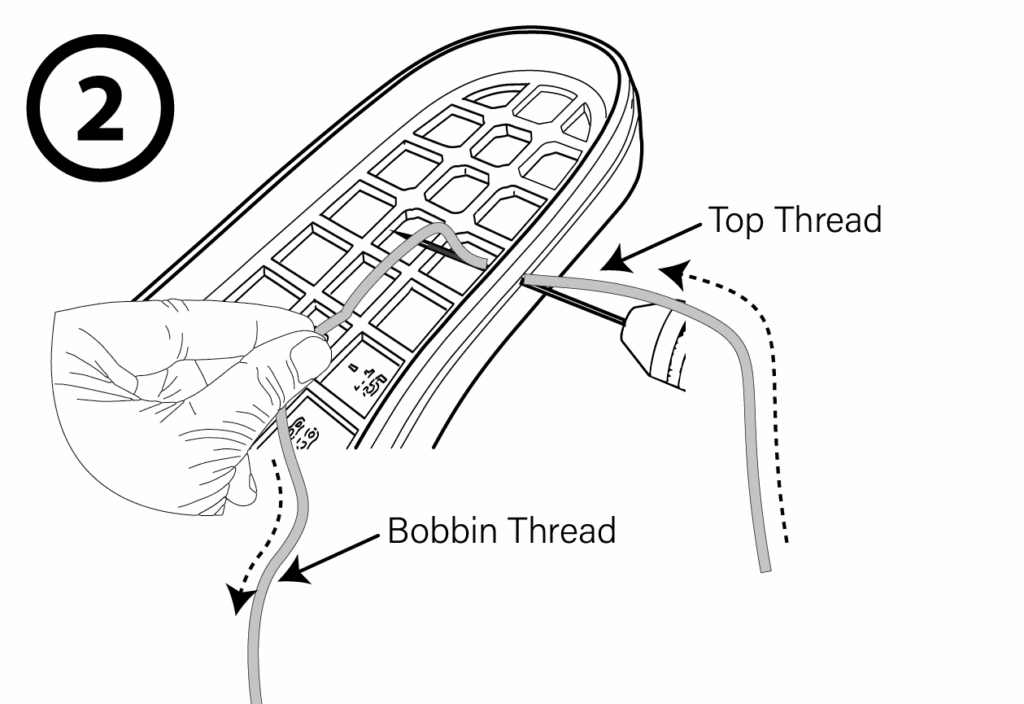
Withdraw the needle just enough to create a loop, and feed the bobbin thread into the loop.
Pro tip: Make sure you catch the loop BEHIND the needle.
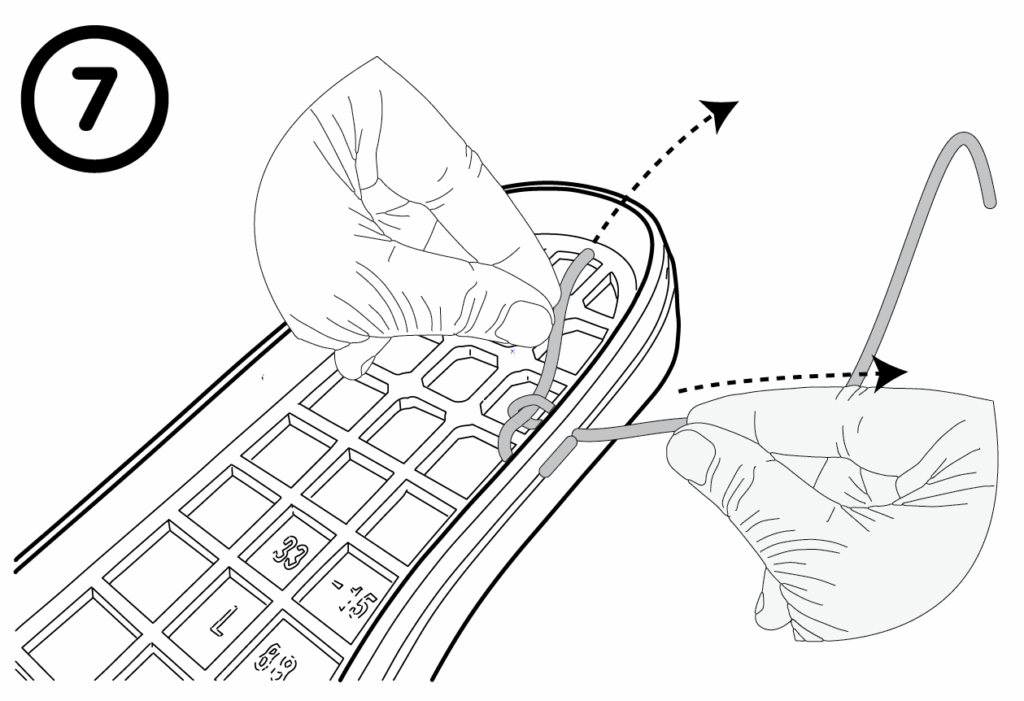
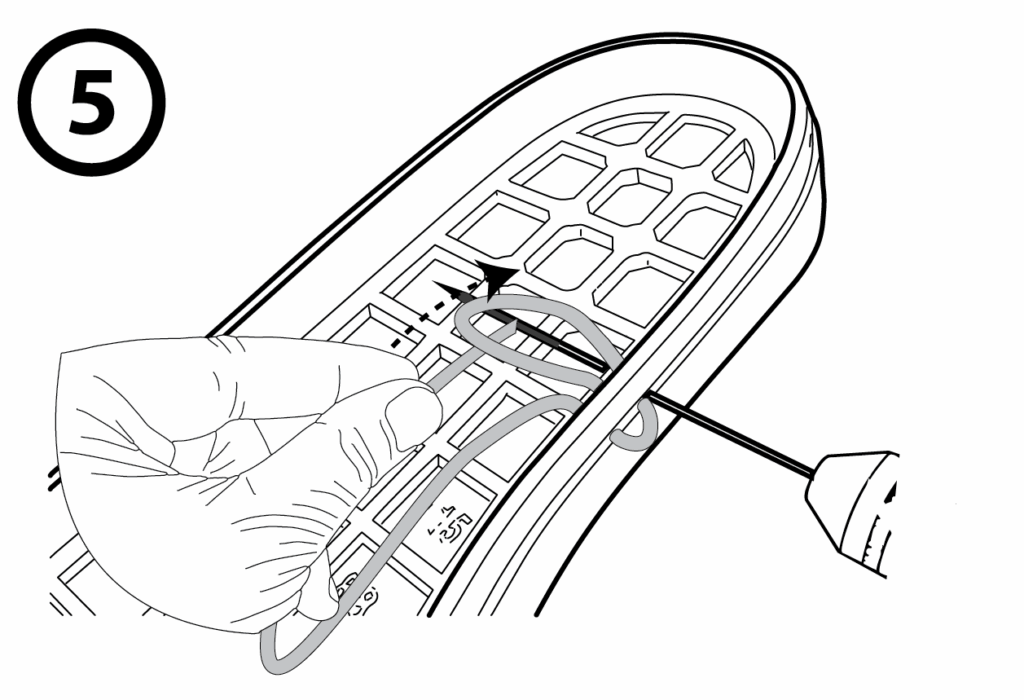
With the needle out of the way, pull the bobbin and top stitch threads tight to create your first stitch.
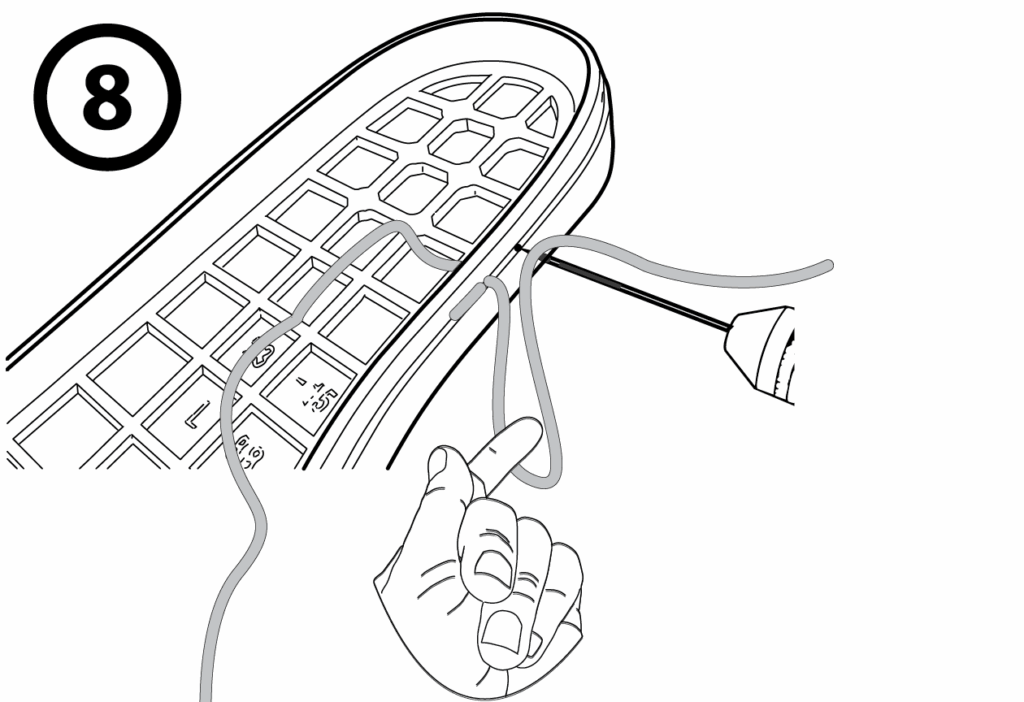
Repeat around the outsole to fully secure the upper. When you arrive at the last stitch, it’s time to create a knot. Insert the awl needle and pull the top stitching thread free of the needle. Remove the needle. With both ends of the thread inside the shoe, knot them together and trim the excess.
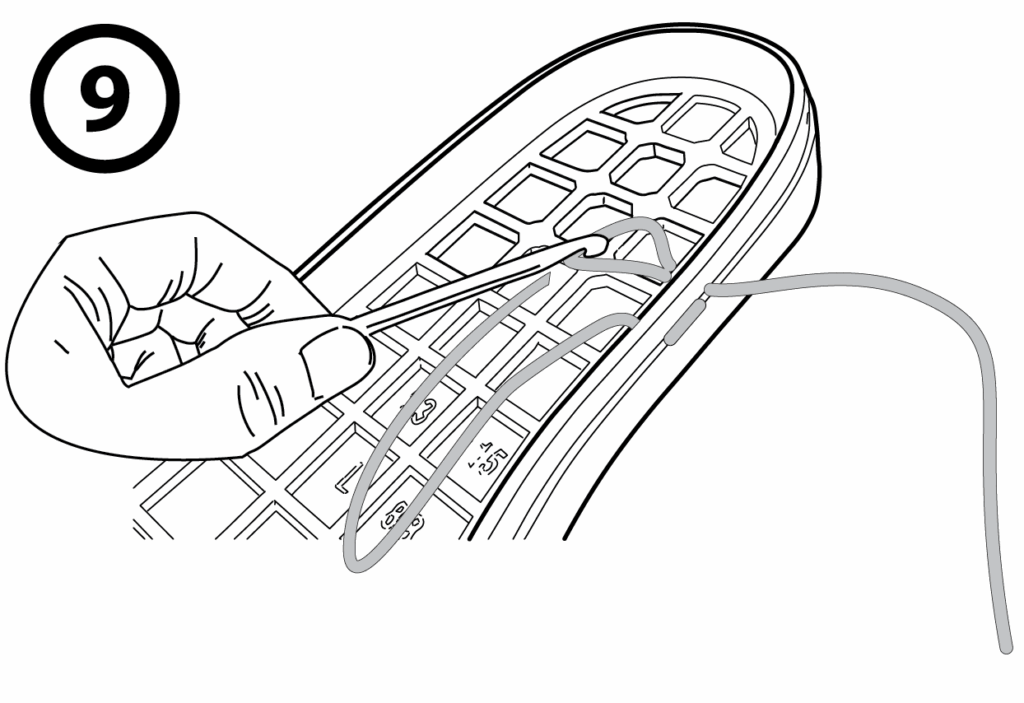
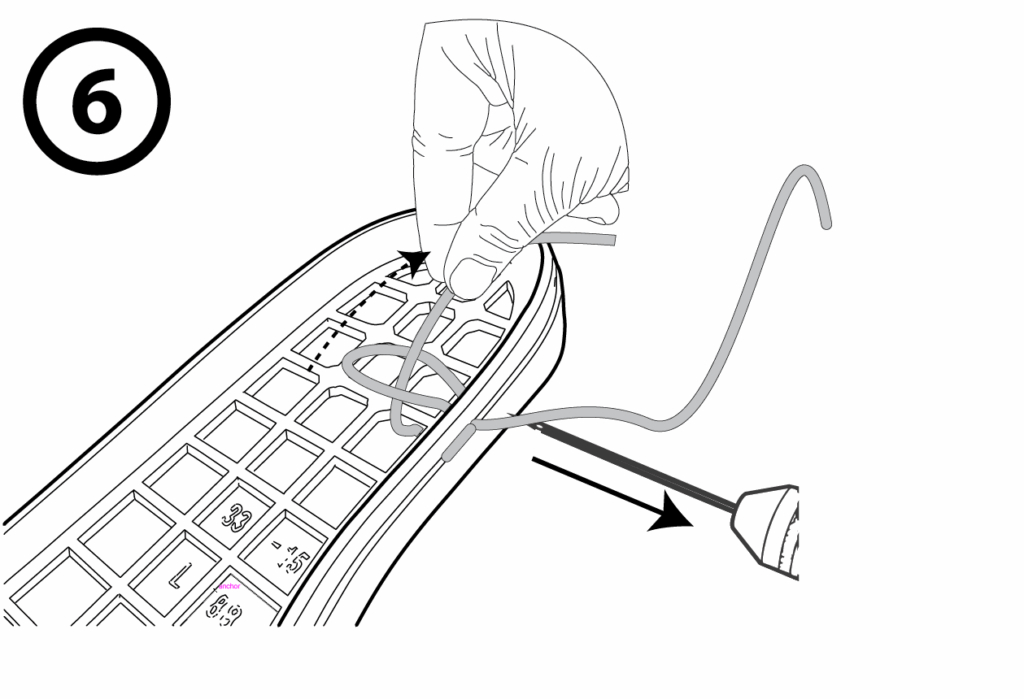
Pro Tip: Use a crochet hook to help open the loop inside the shoe.