How to Make Quilted Sneakers at Home: A Complete DIY Guide
DIY Quilted Sneakers:
A Complete Step-by-Step Guide
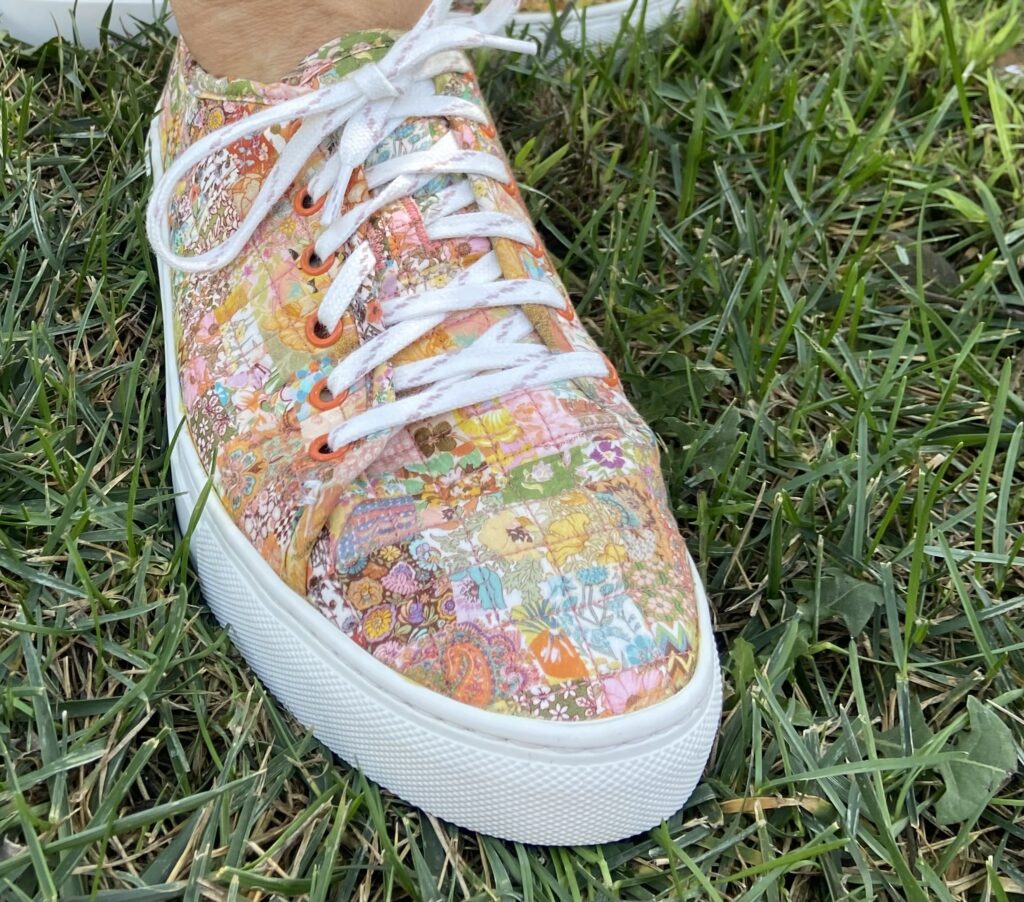
Crafting your own quilted sneakers is both an artistic and functional project. Whether you’re a shoemaking enthusiast, sewing superstar, or a quilting hobbyist, this guide walks you through the entire process of creating a custom pair of sneakers using the Quilter’s Sneaker Kit for DIY Beginners or other DIY build kits we offer.
You will need basic sewing skills, quilting materials, and household tools. By following this comprehensive guide, you’ll learn how to combine your sewing skills and quilting techniques with sneaker construction to create a pair of truly unique and functional shoes.
In this guide, we explain two different construction options: “Quick Build” method, and the more durable “Glue -N- Stich” process. We cover planning, quilting, construction, and finishing steps.
QUICK BUILD QUILTED SNEAKER
Gathering Tools and Materials
Before you begin, make sure you have everything you need at hand. Having a dedicated workspace, good lighting, and the right materials makes a huge difference.
Essential Tools and Supplies you will need to make a quilted sneaker :
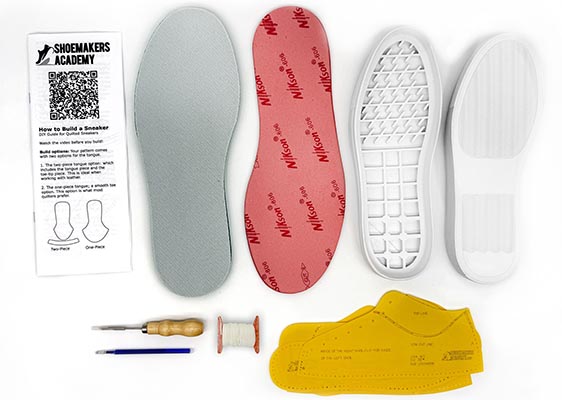
Shoemakers Academy Sneaker Quilters Kit Items included in the kit: Rubber Outsoles Lasting Boards: Pink Memory Foam Footbeds: white mesh with green foam Sole Stitching Awl needle with wooden handle Waxed Thread: White, 30 feet Sneaker pattern template Heat-erasable marking pen: Blue
You will also need:
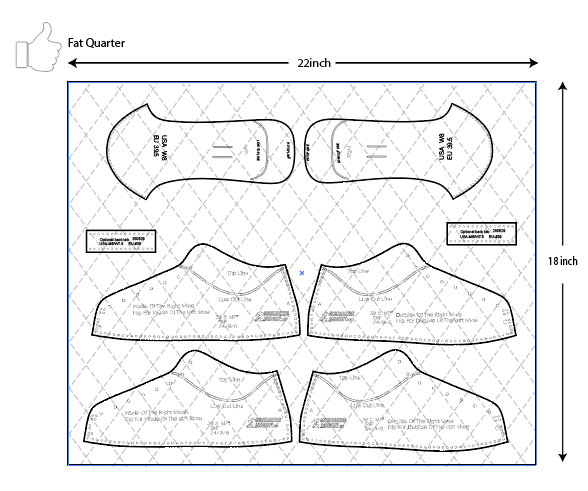
Fat quarter or fabric scraps to quilt (approx.1 yard total) 18” x 22” inches
Some extra fabric that will not be quilted. To cover the footbed
Crochet hook or wire hook (optional for channel stitching)
Planning & Template Preparation for your Quilted Sneakers
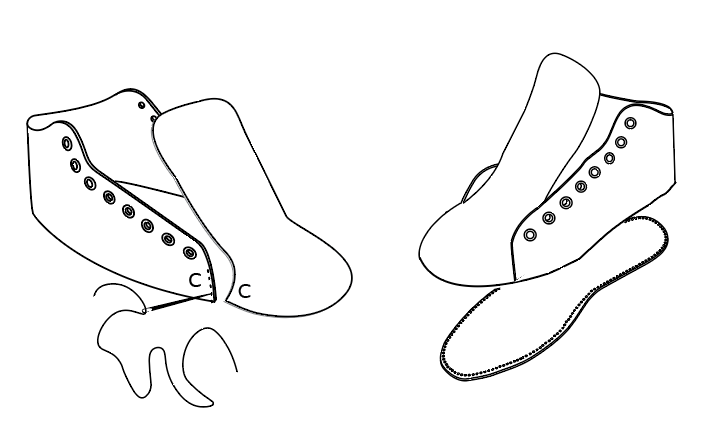
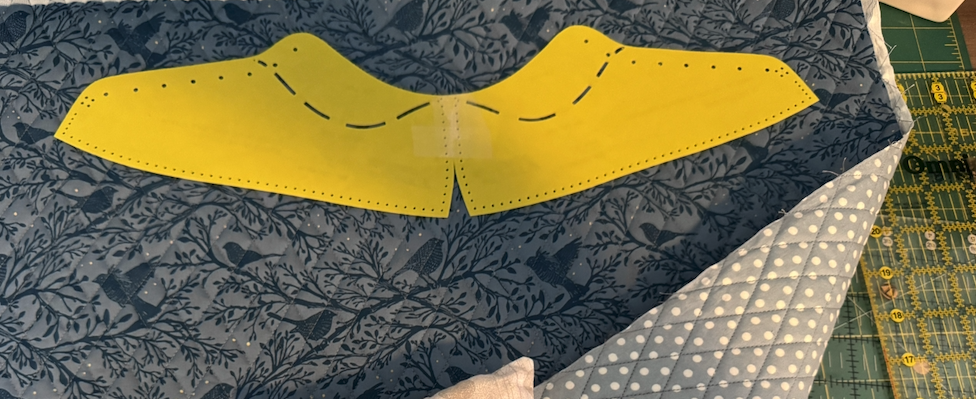
Step 1: Designing your shoe The Shoemakers Academy sneaker template pattern offers two tongue styles and two collar heights. The kit includes the tongue patterns, side panels, footbed pattern, and may include a back strap pattern.
One-Piece Tongue/Toe: Gives quilted shoes a sleek and continuous upper look.
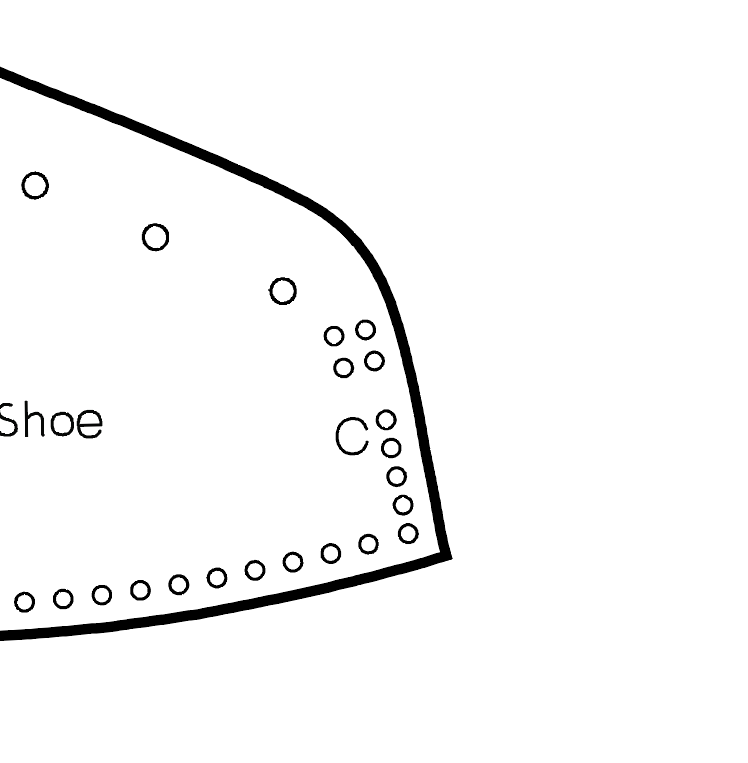
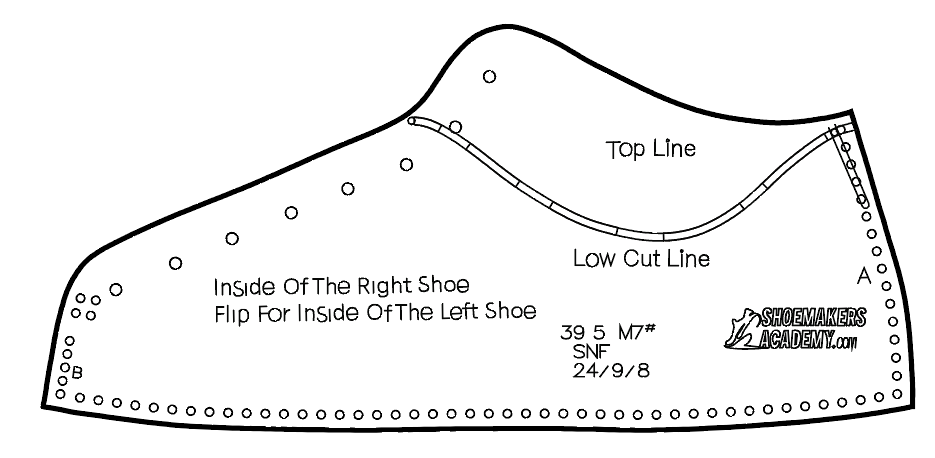
Step 2: Arrange your template Your precut sneaker template is already 100% to scale, but does NOT have any seam allowances added. The perforations on the pattern are for leather and hand sewing, but you can also use them for a stitching guide. The larger holes on the pattern are for your shoe lace eyelets.
Make sure: Use the long tongue pattern for high tops. Short tongue line for the low cut.
Remeber to keep some fabric for your footbed decoration and binding edges.
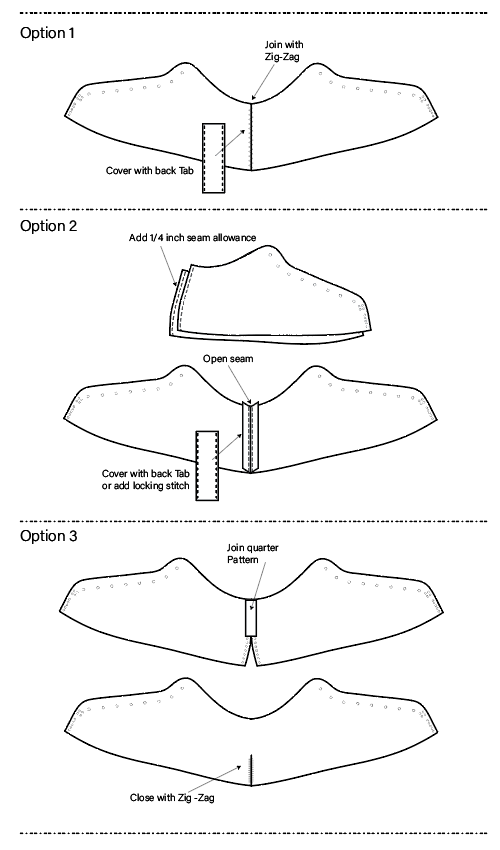
Back Seam: You have three options to create your back seam.
To create a curved heel seam: zig-zag the parts together and cover with flat binding tape.
To create a curved heel seam: add 1/4 inch seam allowance, then join the parts with the outside surface fabrics facing out. Turn out the seam, then cover with binding tape or a back tab.
Combine the pattern and cut as one piece: zig-zag the bottom 1/2 of the seam to create the curve. The zig-zag will be hidden below the outsole.
Step 3: Plan Quilt Design and Layout Plan your design visually before cutting:
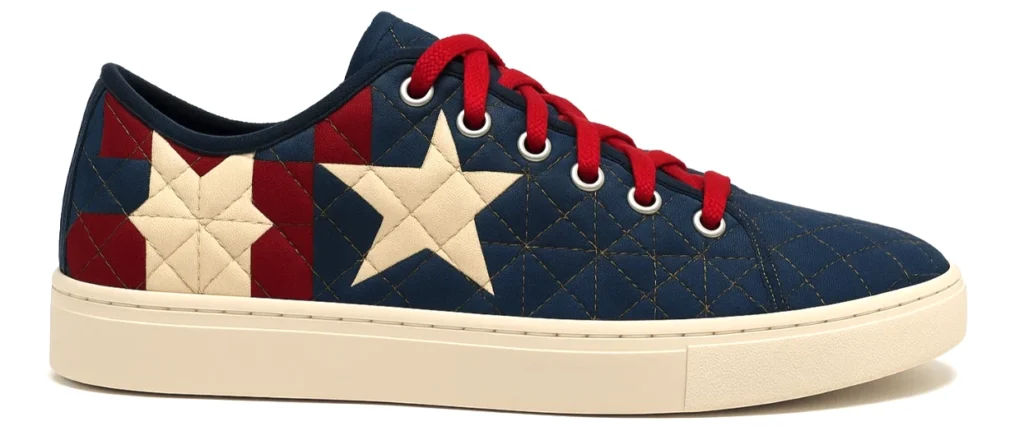
Choose quilt motif: diamonds, crosshatch, channel, etc.
Consider the color contrast between the toe, quarters, and tongue.
Have fun, be creative! Consider symmetry across the left and right shoes.
Plan how the batting will lie beneath decorative stitching.
Determine thread colors that will complement your design.
Consider your binding, lace, and eyelet colors.
Don’t forget to plan the fabric design for the top of your footbed.
Sewing Your Quilted Fabric Panels
Step 4: Prepare Quilt Sandwich If you are attending a class, preparing your quilted panel will be specified as your “homework”. You will need to have this ready. Please confirm with your teacher. You will need a fat quarter of quilted fabric and some extra non-quilted fabric if you want to cover the footbed.
Layer fabric top, batting (center), and backing fabric (optional for this step).
Baste layers together using spray adhesive or pins.
Underlayment (Recommended if you would like to build a shoe for everyday wear.)
Lining Fabric – It’s important to select a comfortable, color-fast fabric. This lining may be included in your quilt, OR not, depending on how you plan to finish your edges.
At this stage, you may add reinforcements or underlayment to the upper fabric. If you don’t plan to quilt through your lining, you may add heel stiffeners and toe reinforcements later.
Step 5: Quilt Your Panels
Stitch straight lines, grids, or chevrons using a machine or by hand.
Keep stitch spacing
Press panels gently to flatten.
Be creative, follow your shoe design or fabric pattern.
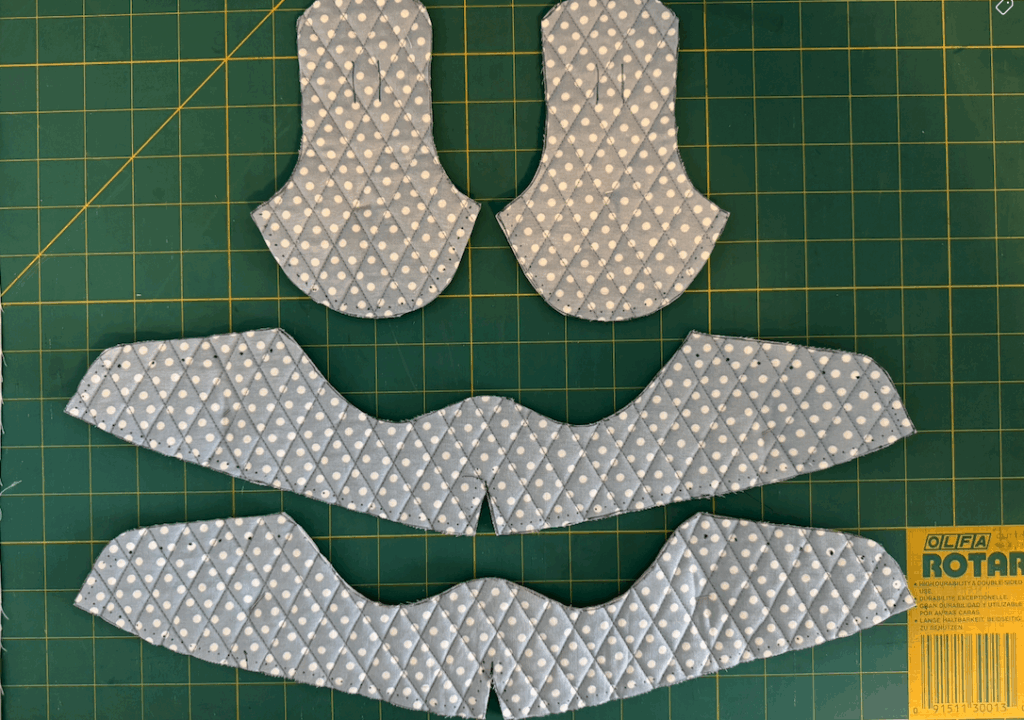
Trace pattern pieces on quilted panel (batting side).
Use the RIGHT-side pattern to create LEFT shoe panels and vice versa. You must mark the parts, as you will have 4 different pieces.
If you joined your side panel at the heel, make sure you have marked the left and right.
If you plan to edge bind, overlock, or use a merrowed technique, then NO seam allowance is required.
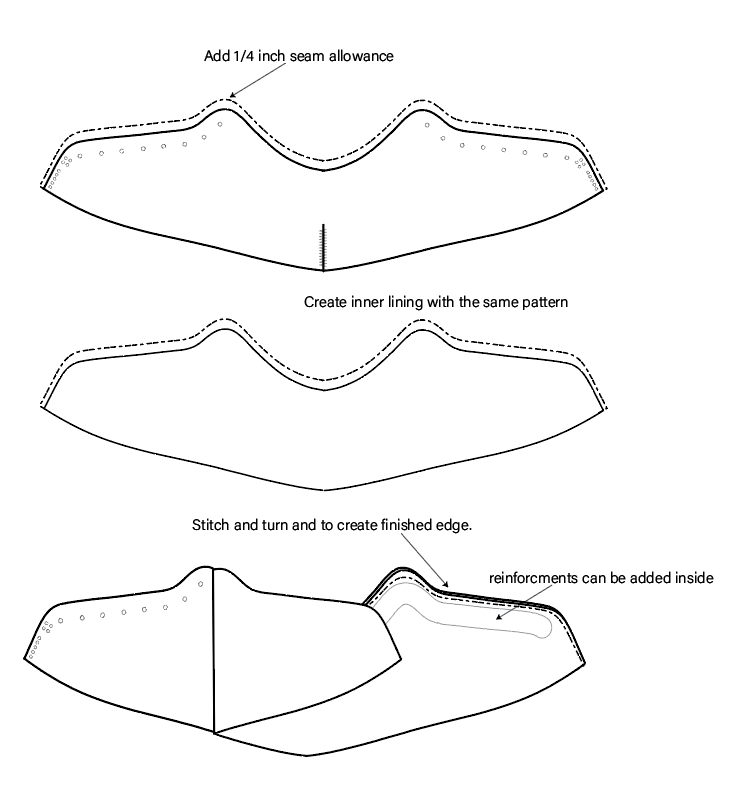
If you plan to turn out the tongue and quarter edges, then add at least a ¼-inch seam allowance to the quarter.
Make a count, you should have 4 quarters and two tongues. The pattern has an optional back tab and footbed cover.
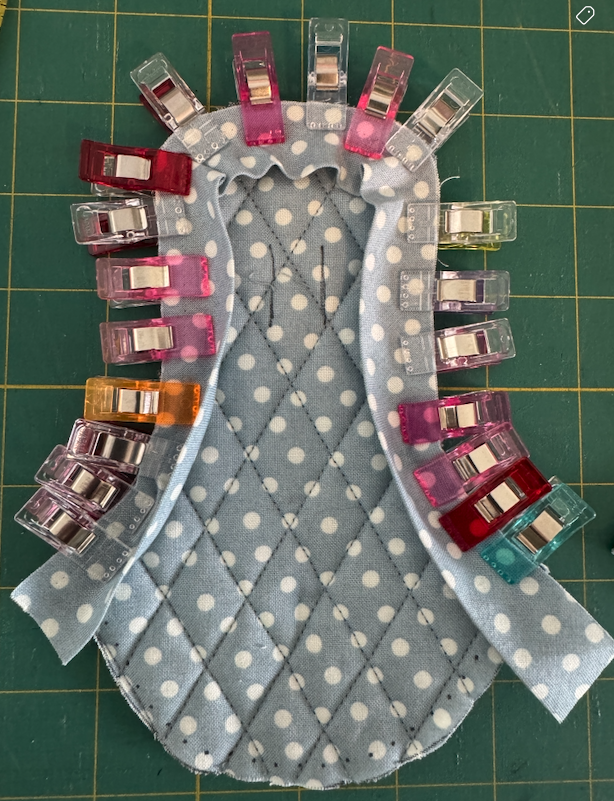
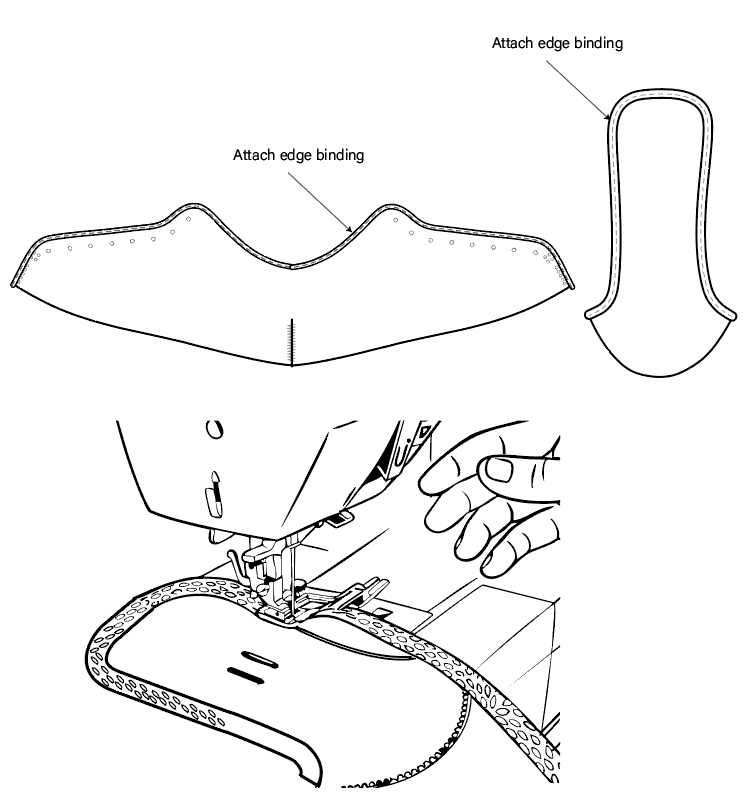
Step 7: Add Lining and Edge Bindings to Panels
If you did not quilt your lining, now it’s time to add reinforcements or underlayment.
Shoemakers Academy offers heat-moldable toe and heel counter materials.
These can be installed flat, then heat molded into shape later with a heat gun or hair dryer.
Attached the lining by sewing around the edges of the side quarter and tongue.
Turn the collar lining out over the top collar, then turn the tongue out.
Iron these parts flat. You may choose to add fusable backing or a top stitch around the edge.
If you plan to edge bind, overlock, or use a merrowed technique, then NO seam allowance is required.
If you plan to turn out the tongue and quarter edges, then add at least ¼ quarter-inch seam allowance.
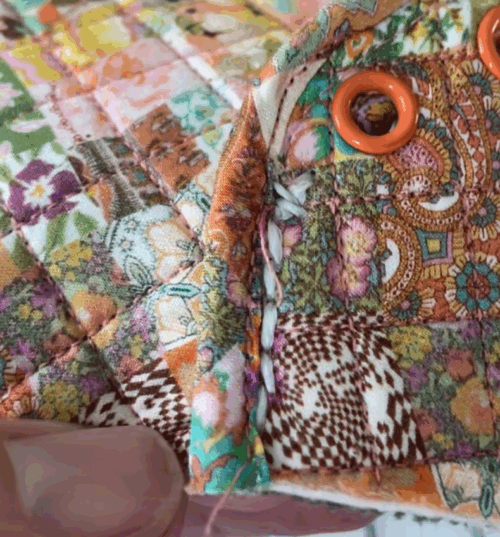
Eyelets, Tabs, and Prepping for Sneaker Construction
Step 8: Install Eyelets Before you start, grab some scraps of the quilted fabric to practice punching holes and setting eyelets. Make sure your lining is attached before you start the eyelets. Also, you will need to use a hammer. If you don’t eyelets you can get the kit here.
Use the pattern quarter templates to locate and mark the eyelet locations.
Punch the 5 mm holes using the template markings.
With the lining face up, insert the longer eyelet part into the hole.
With the lining face up, place the backing ring onto the rivet shaft.
Insert the setting base from the back. Carefully hammer the setting tool.
Tap gently, increasing the pressure until the eyelet shaft is folded over the back.
Remove the setting tool to check your work. The rivet back should be smooth with no split edges.
Repeat to complete all the eyelets.
Step 9: Add Optional Shoelace Keepers You have a few options to make a unique lace keeper.
Sewn lace keeper: Cut two 1.5″ squares from scraps. Fold and press edges. Sew to the tongue, use the template as your guide.
Make two parallel cuts and leave the raw edges. Use the template as your guide.
Use a buttonhole attachment if your machine has one.
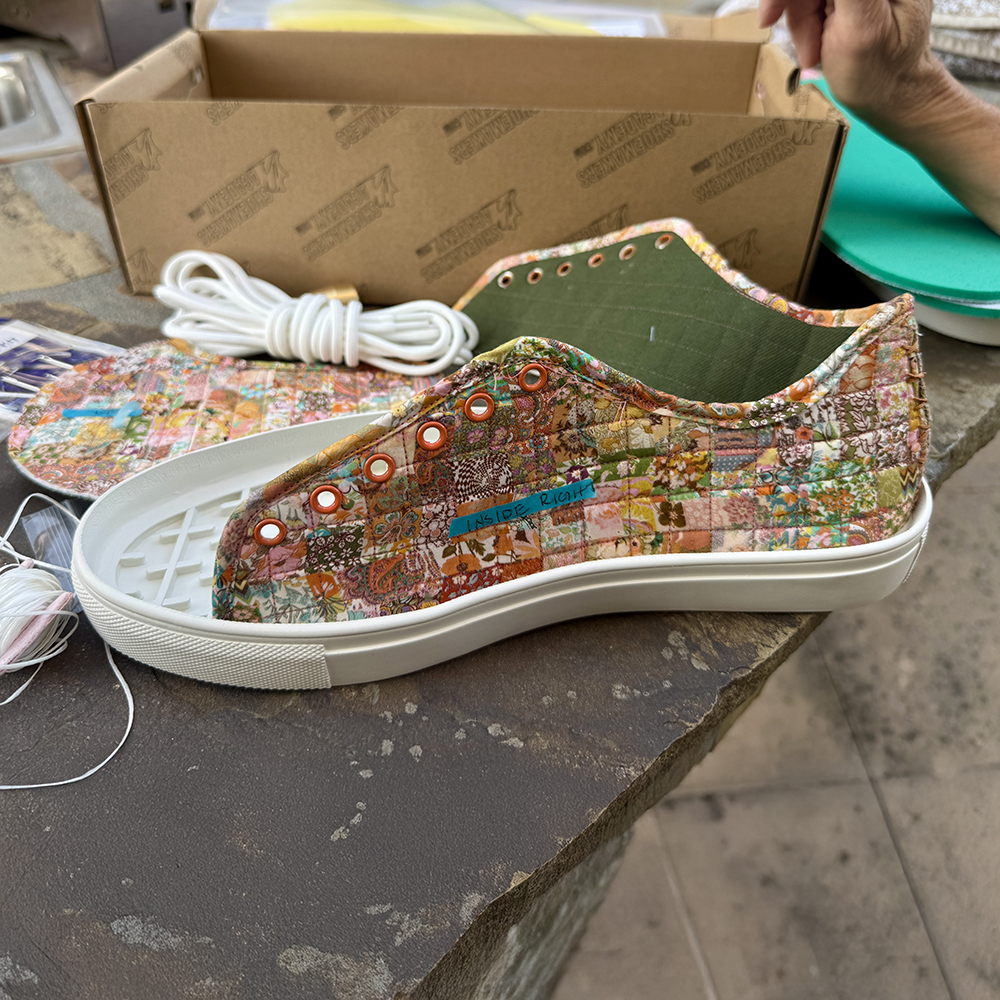
Let's Assemble The Upper
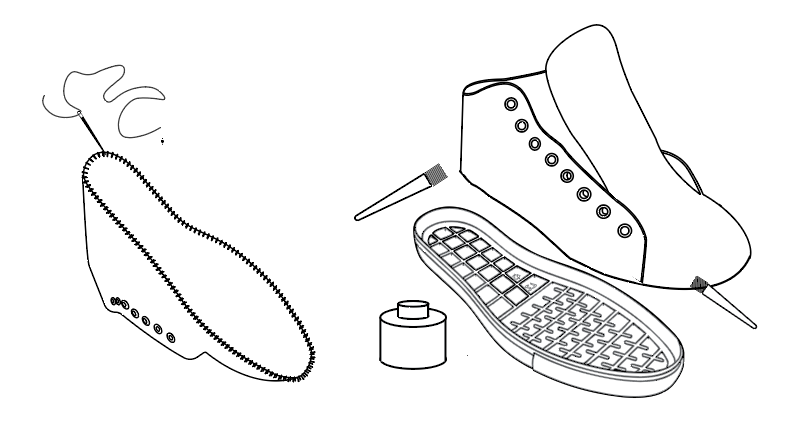
Step 10: Quick Build Assembly First, let’s sew the quarter panels to the outsole, then we will finish with the toe. You will be using the sewing awl or a speedy stitcher if you have one.
Make sure you have the correct parts to match the left and right outsoles
If you have double-stick tape, you can apply it to the inside edge of the outsole.
Center the upper and align it with the center of the outsole heel.
Once appropriately aligned, press the upper onto the tape to hold it in place.
Start the channel stitching on the outside of the shoe at the front edge of the quarter.
Once the rear quarters are in place, test fit the toe and secure with double stick tape.
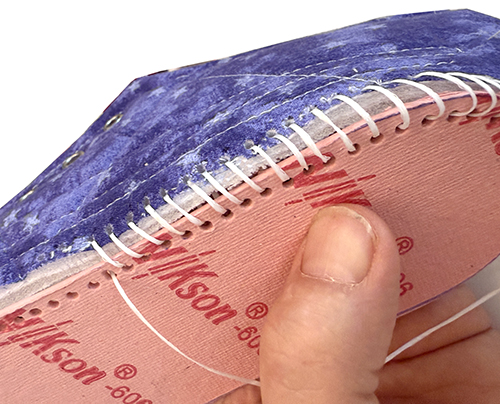
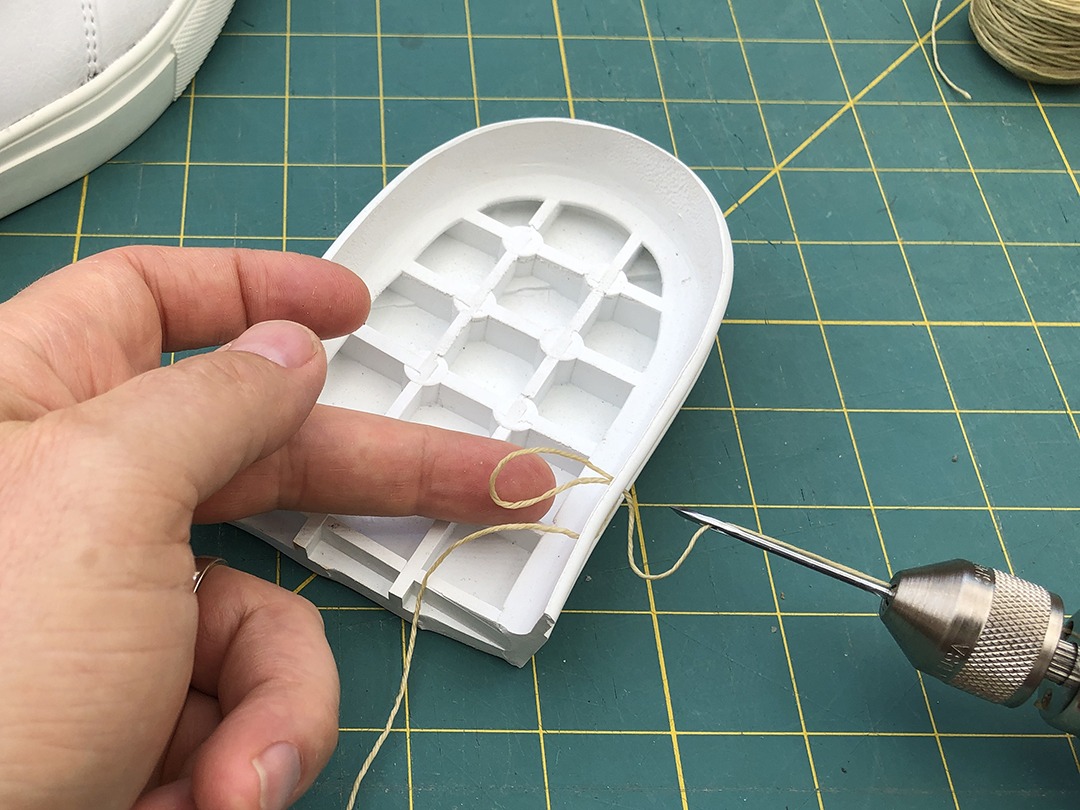
Step 11: Channel Stitching the side panel to the sole For this step, you will need the heavy waxed thread included in your kit and the sole stitching awl.
Using the included waxed thread, make 3 loops around the outsole for the correct length.
Begin at the front of the quarter panel on the outside of the shoe.
With the needle threaded, punch the sewing awl into the stitching groove.
From inside the shoe, pull 1/3 of the thread inside. Withdraw the awl. This will be your bobbin thread.
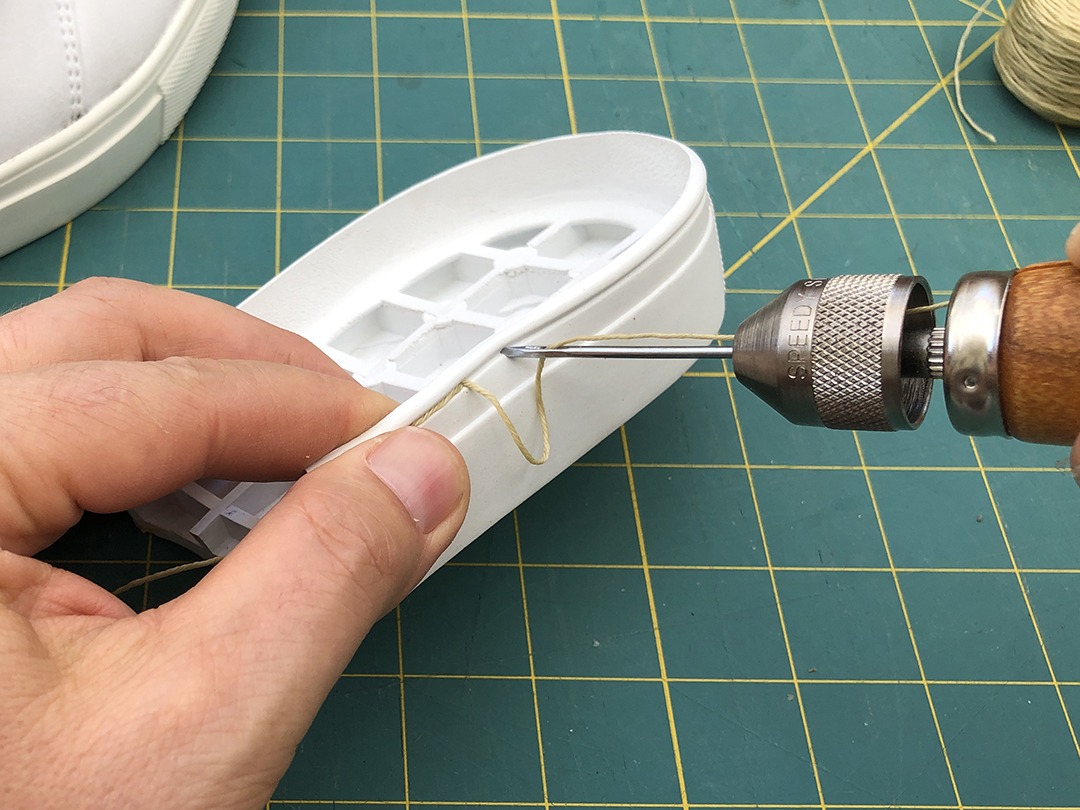
To make your first stitch, push the threaded awl into the groove, then, to create the loop, withdraw the needle ½ way.
Now pull the bobbin thread through the loop to make the stitch.
Withdraw the needle and pull the thread to tighten the stitch.
Be careful not to twist the awl as you sew.
Repeat around the entire shoe.
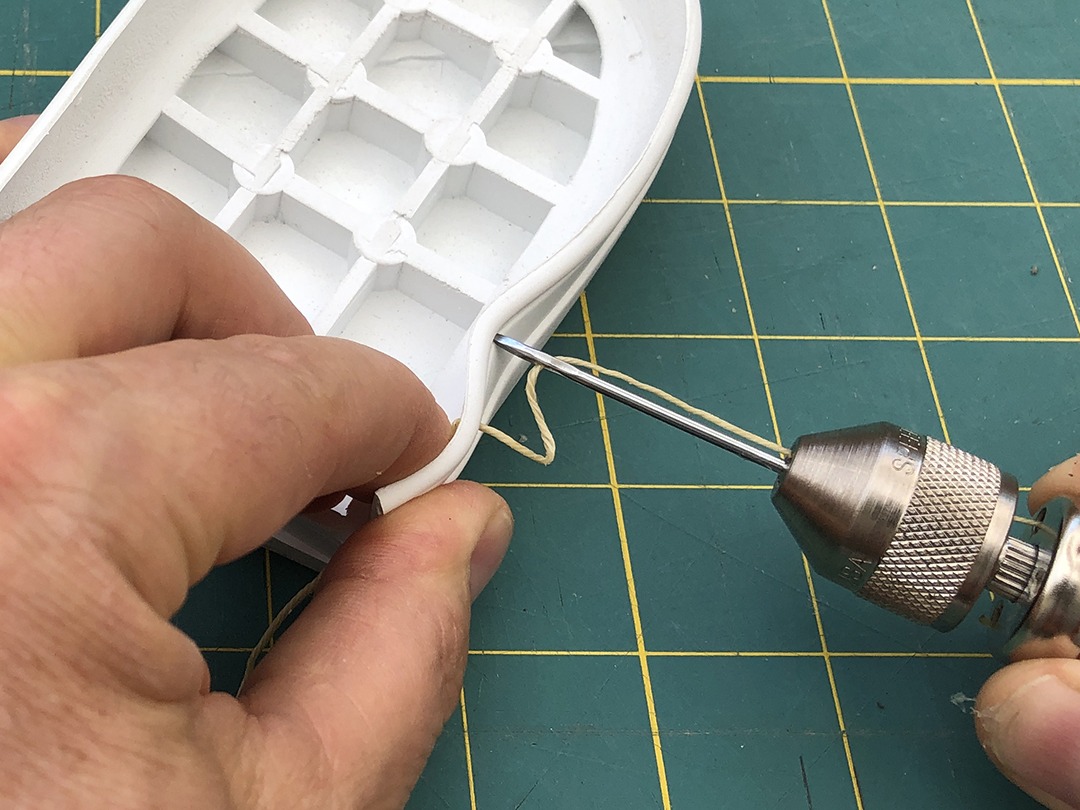
To secure the final stitch, pull the thread end inside the shoe, then knot and trim.
Step 12: Channel Stitching the tongue to the sole For this step, you will need to align the tongue behind the side panel. The pattern overlap is ¼ inch. Test fit before you start sewing.
Begin on the front of the quarter panel on the outside of the shoe.
Following the same stitching process, you may need a crochet hook to help pull the bobbin thread through the loop.
To secure the final stitch, pull the thread end inside the shoe, then knot and trim.
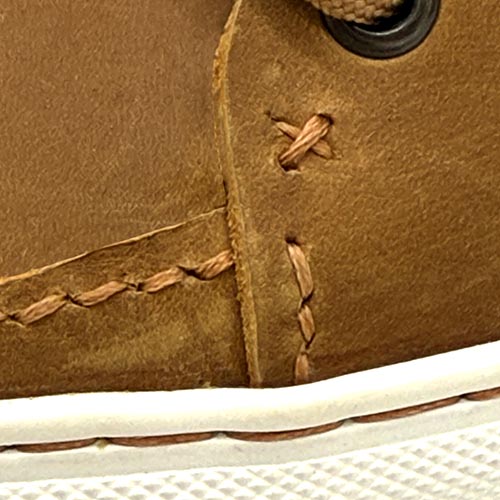
Step 13: Final Tongue Cross Stitch
Mark 4 holes on the quarter and Sew through the tongue.
Use a cross or square stitch pattern.
Hide the knot between layers.
Making a Stronger Shoe
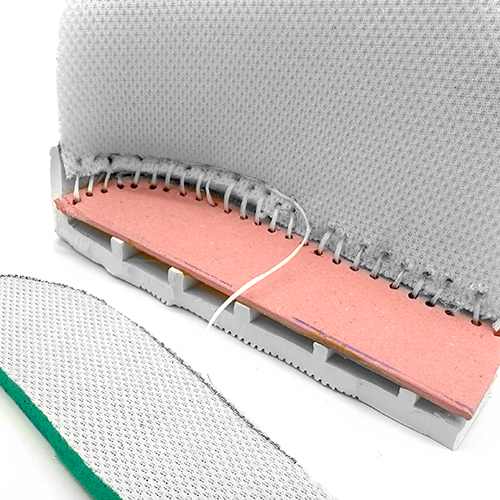
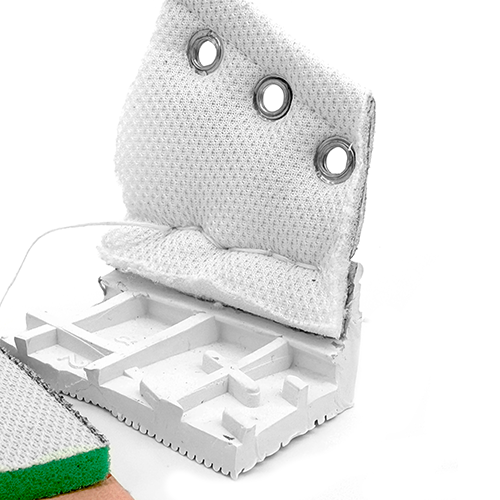
The Shoemakers Academy kit includes the option to make stronger shoes. Glue -N- Stich process: For this method you will sew the upper parts to the pink lasting board, then glue this assembly into the outsole. Then you secure the upper with the same outsole channel stitching process. This method requires a bit more time to make but produces a more durable and supportive shoe, more suitable for everyday wear.
Punch hole with 5mm spacing around the bottom of the upper.
Punch holes around the perimeter of the pink lasting board.
The holes are marked on your pattern set.
Start stitch at heel midpoint.
Leave 1/16″ gap from material edge to board edge.
Keep the thread tension loose to allow fitting.
With the pink board attached the upper can be glued to the sole with Barge Brand contact cement.
Once the glue has set, complete the shoe with the channel stitching.
Finishing Touches
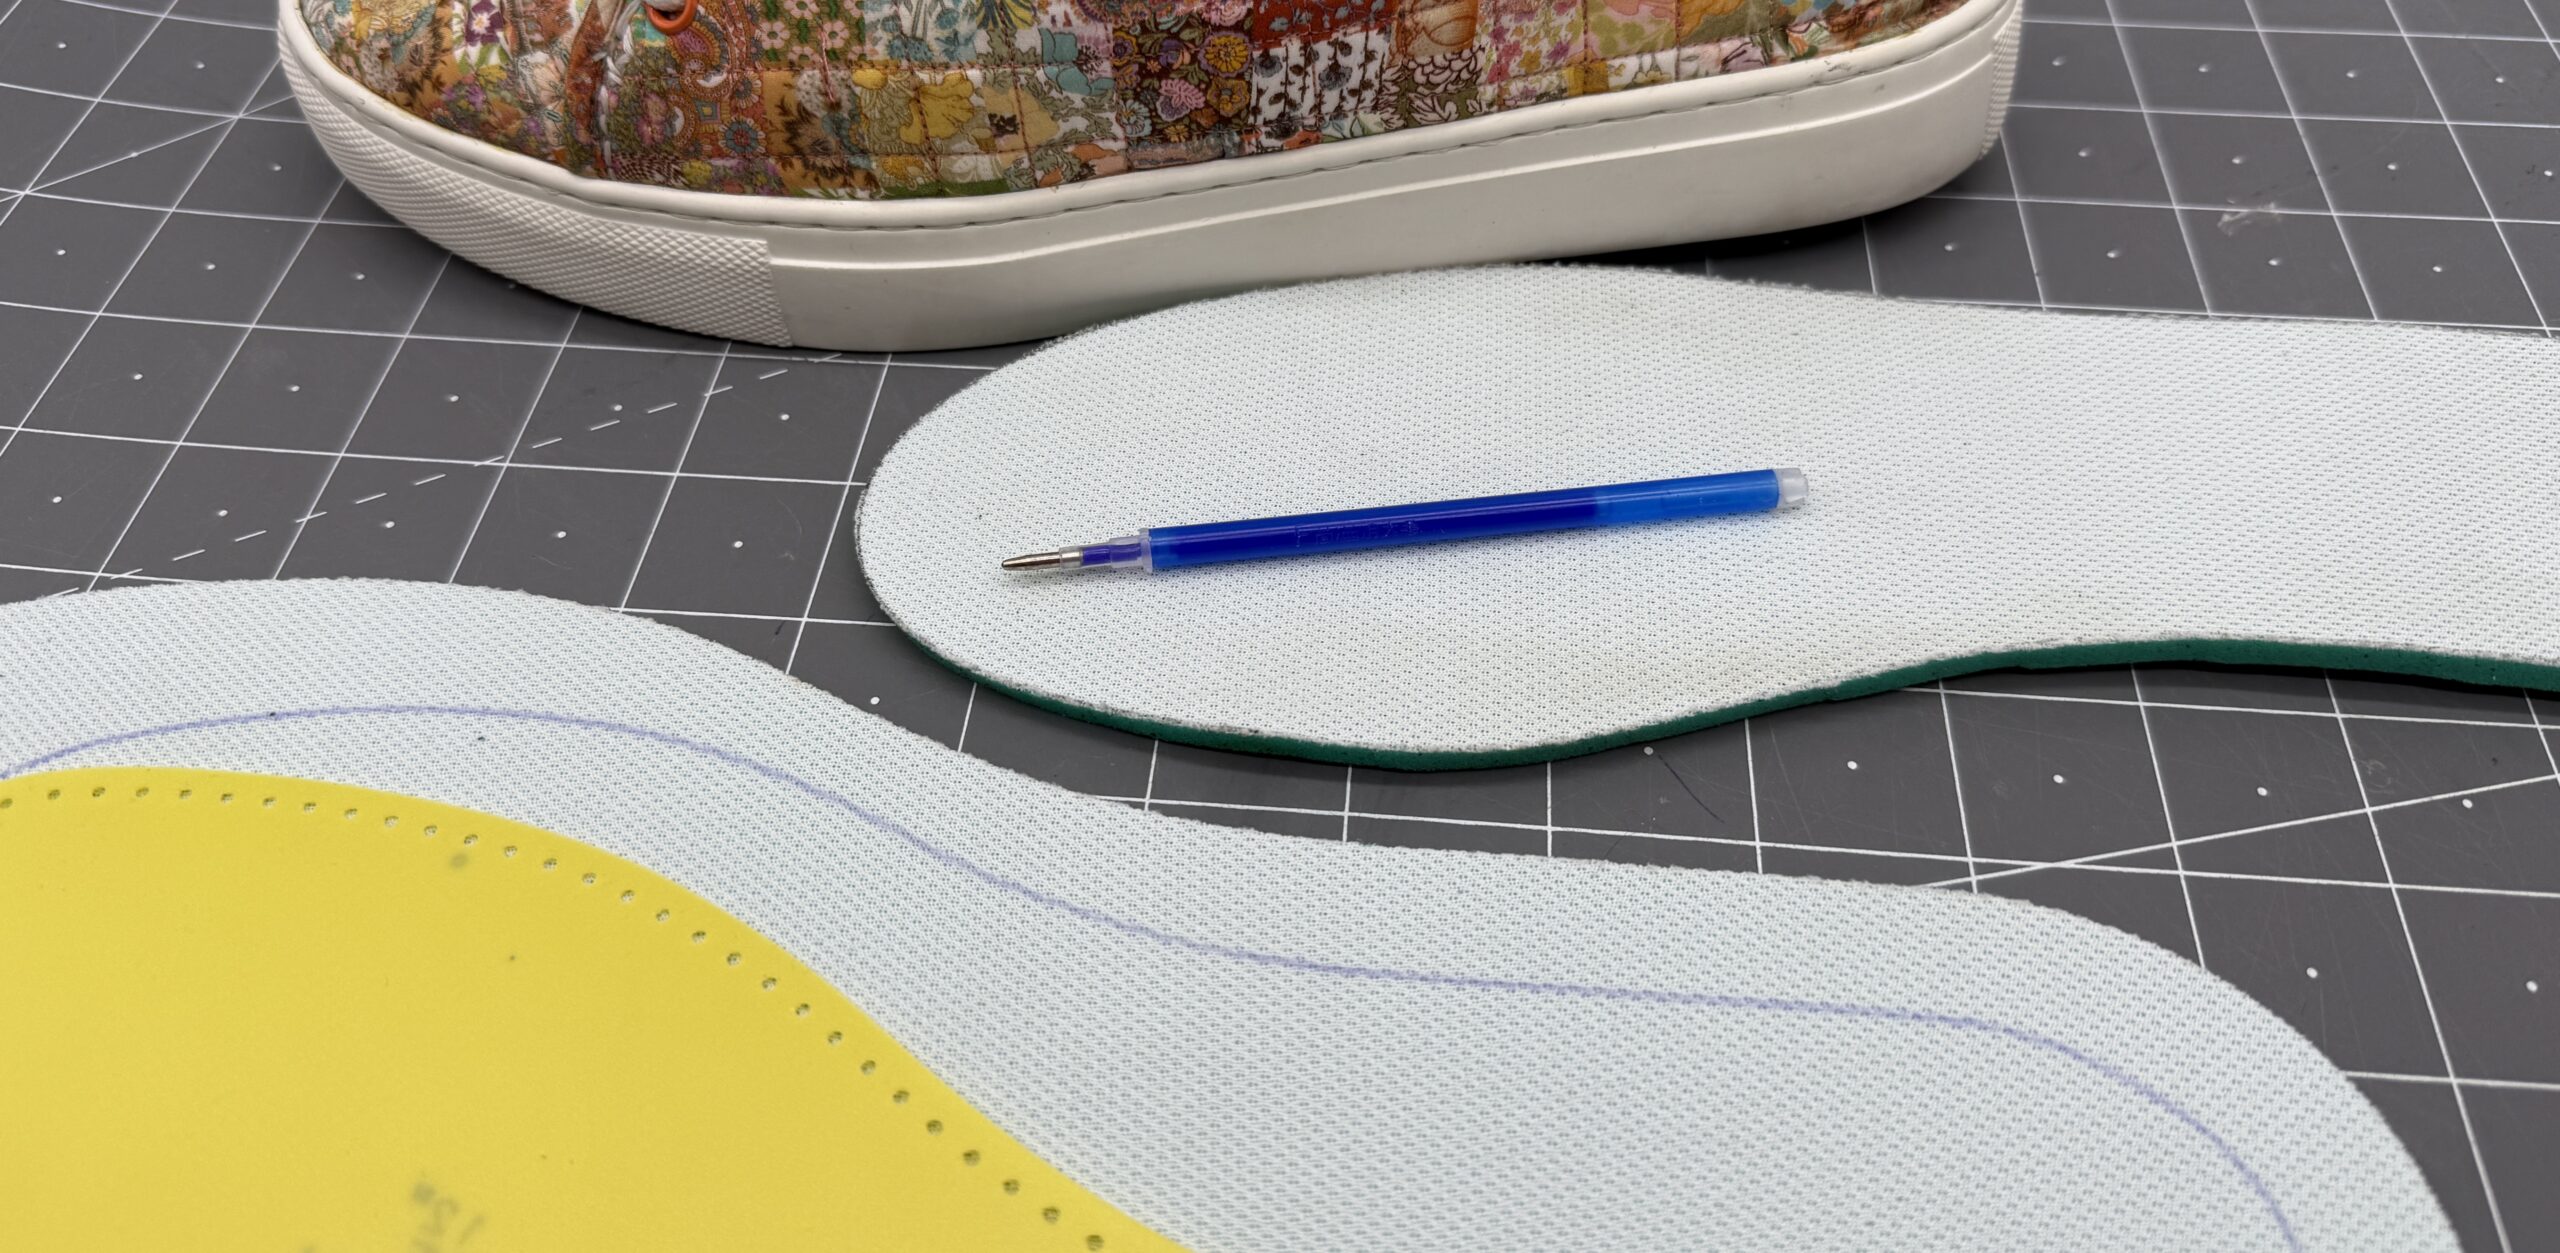
Step 14: Footbed & Fit Test Now it’s time for the finishing touches. Collect your shoe lace and foobed foam.
Trim footbed edges
For a firmer footbed, trim the pink lasting board and place it under the footbed.
Choose a colorful shoe lace to compliment your style (flat, round, elastic).


